How to Create Consistent Character with Midjourney’s New Features!
Visual examples and tricks with using Midjournye’s Vary Region, Zoom-Out and Pan.
Midjourney is amazing at creating illustrations and graphics. However, do you struggle to remain consistent with character creation? I have been receiving questions on how to create a consistent character with Midjourney.
Previously, you may have used the “Image Prompt” or “Seed” to achieve consistency. It may not work all the time and this can be frustrating.
However, with the introduction of three new Midjourney features — “Vary Region,” “Zoom-Out,” and “Pan” — coupled with the techniques I’ll share today, you can now create a consistent character for your projects and narratives!
Let’s dive right in!

If you are new to Midjourney, follow this comprehensive guide and prompts to start.
Remaining consistency is important for crafting stories, especially graphic novels, comics and books that you want to sell to preserve the story’s coherence.
Today, I will share tricks and guide you step-by-step in creating a consistent character to narrate your graphic novels and comics starting from basics to advanced.
- Part 1: Create A Consistent Character
- Part 2: Add context — With Zoom-Out and Panning
- Part 3: Create Consistent Character with Multiple Expressions ( Advanced )
- Part 4: Character with Coherent Movement
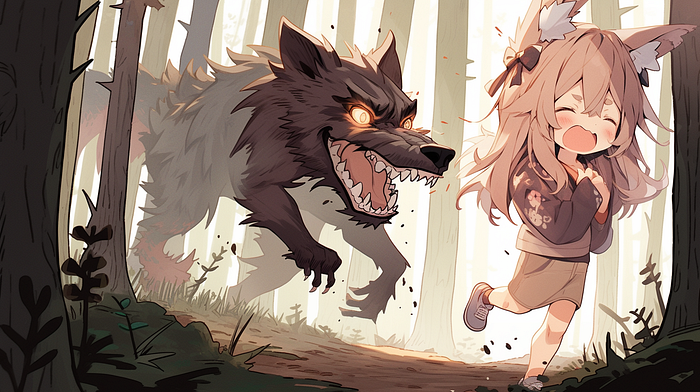
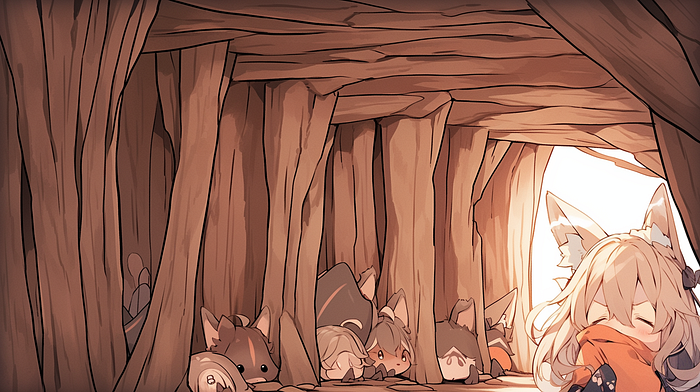
You will learn how to create a story like this one here by the end of this post. Let’s get started with the basics!


The New Features — Vary, Zoom and Pan
First, let’s talk about some basics of Midjourney’s latest features.
With the release of the new features, every time you upscale an image with the U buttons, a list of options will appear below the image now that allows you to:
- Vary Region (Inpainting) — Select and regenerate specific parts of an image that includes removing, adding or changing part of the image with the Editor.
- Zoom-Out — Expand the canvas of an image while keeping the original content unchanged by 2x, 1.5x or custom size.
- Panning — Extend images in four different directions ⬅️ ➡️ ⬆️ ⬇️.

If you need a thorough and advanced guide to the new features, you can always learn it from my list where I share tricks and usage of Midjourney's features and commands.
🔖 Save the list and never miss any latest tips!

Part 1: Create A Consistent Character
First, let’s start with a simple example.
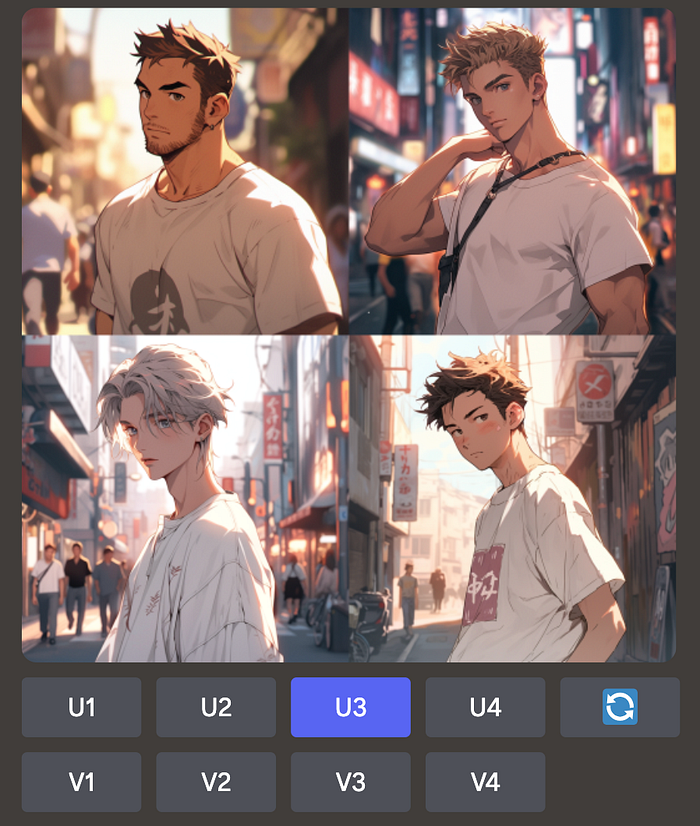
1. Generate and upscale your image
Generate your image as usual with the “/imagine” command. Use the U buttons to upscale your selected image.
Prompt: A handsome Japanese guy in his 20s, Tokyo style, wearing a white t-shirt
--niji 5 --s 180
🌟 Prompt Tips
When it comes to character descriptions, add specific details about someone’s facial features, like their age, eye color, hair color, and skin tone. Keep other elements simple, we can easily make changes to the settings and outfits later.
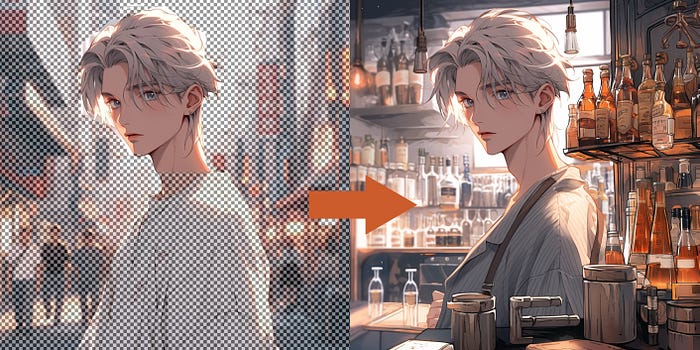
2. Select “Vary (Region)”
Click on the 🖌️ Vary (Region) button to access the editing interface.
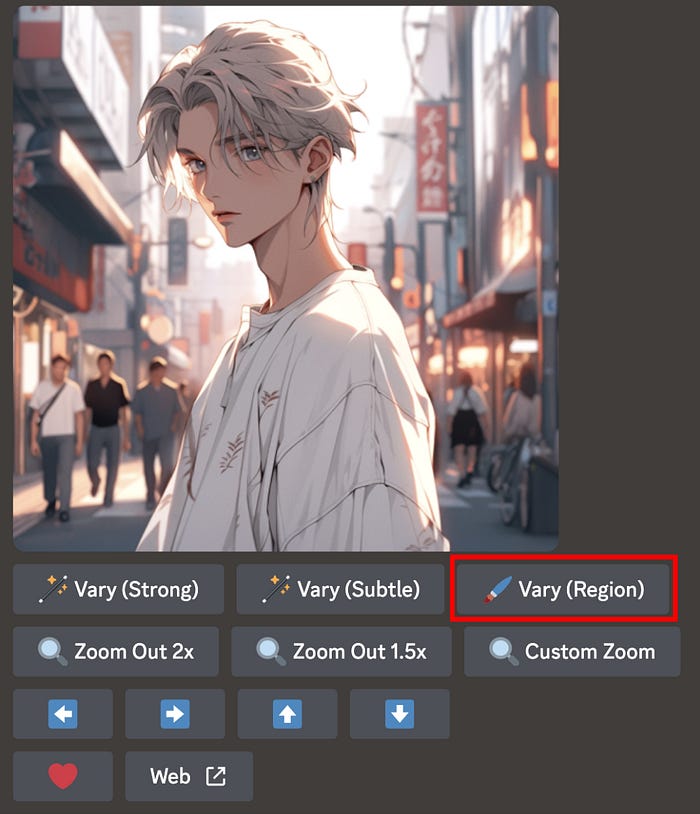
3. Pick Regions for Regeneration
Utilize the freehand or rectangular selection tools to select the areas you would like to make changes.
🌟 Keep Consistency
To keep the character consistent, select all the other areas aside from the face.

4. Enter the Prompt
Edit the prompt to describe desired changes in the chosen area.
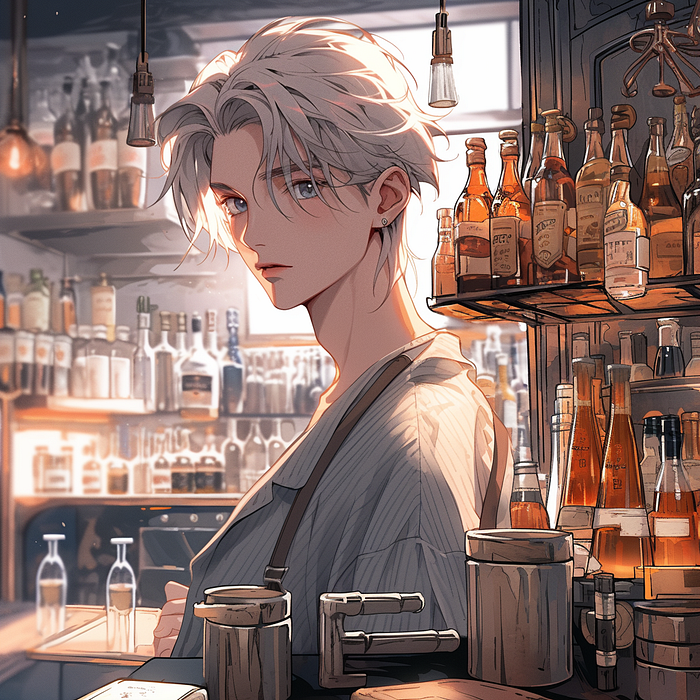
Custom Prompt: Working inside a bar
Utilize the “Vary Region” feature repeatedly and modify the prompts to generate variations.
📌Note: Selection will remain the same whenever you enter the editor.
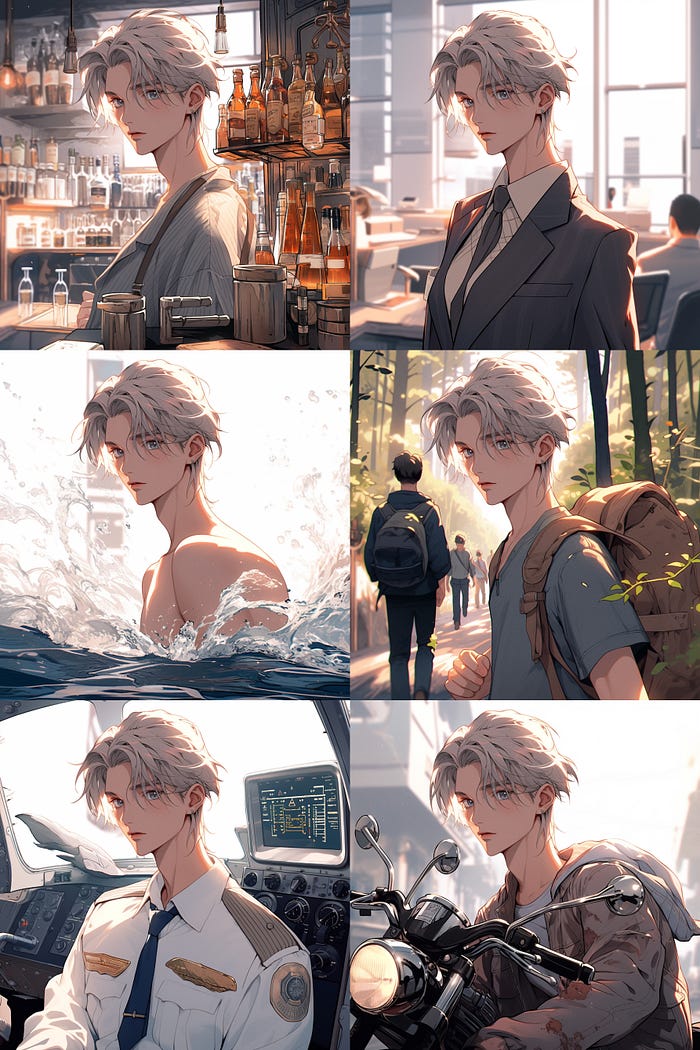
By simply changing the prompt, you can create a consistent character appearing in various settings: swimming in the sea, hiking in the woods, working in the office, inside a bar, driving a motorbike, as a pilot
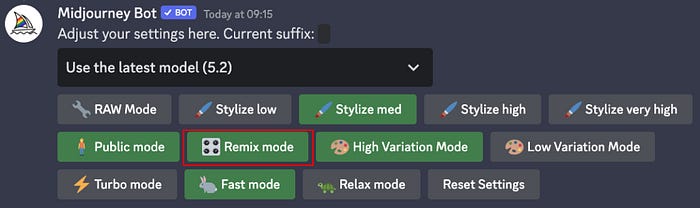
📌 Note: If you cannot see the textbox, you may want to turn “Remix Mode” on in “/settings”
For more “Inpainting” tricks with “Vary Region”, refer to this post:
Sometimes, you might also wish to include the gender. Without doing so, you could potentially generate interesting images like I did.


Part 2: Add context — With Zoom-Out and Pan
Next, let’s see what more can we do with the two other features.
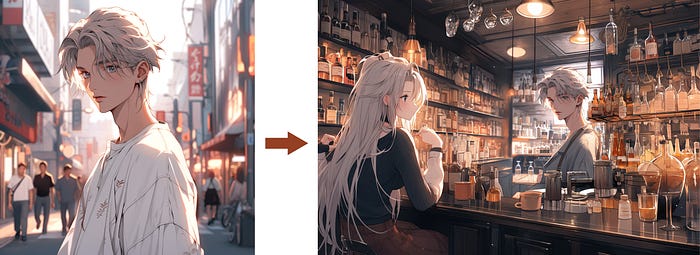
Not only can you switch the surroundings, clothing and profession, but you can also further extend the image by using the “Zoom Out” or “Pan” features.
🌟 This enables you to extend your narrative and add intricate details.
Take the example inside a bar as an example
Step 1. Vary Region
Vary Region with a custom prompt: Working in a bar
Step 2. Zoom Out x 2
The “Zoom-Out” feature allows you to extend your images to add more context while keeping your character unchanged.
Zoom the image out x 2
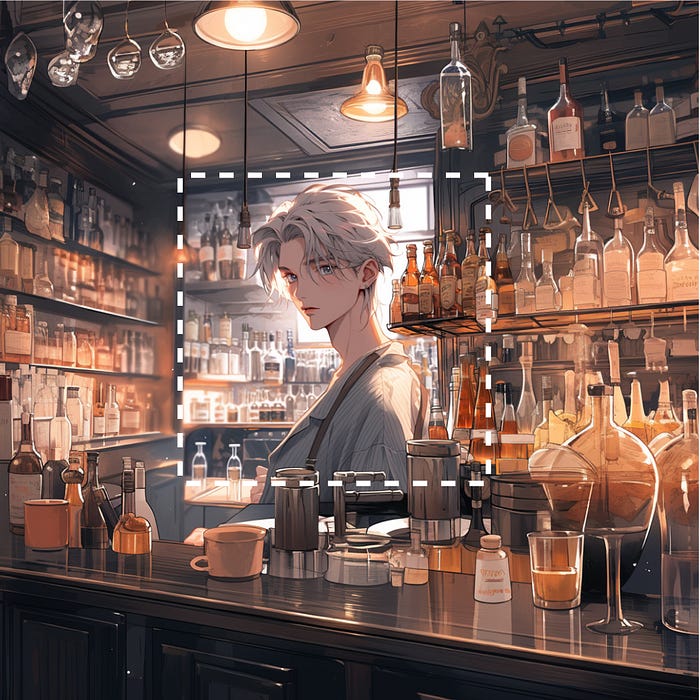
Step 3. Pan
Pan works similarly to Zoom but allows you to extend your image in 4 different directions.
In this case, I used the "Left arrow ➡⬅️ ” to pan the image to the left with a custom prompt: A beautiful customer sitting in front of the bar.
📌 Note: All three features allow you to add in details with custom prompts
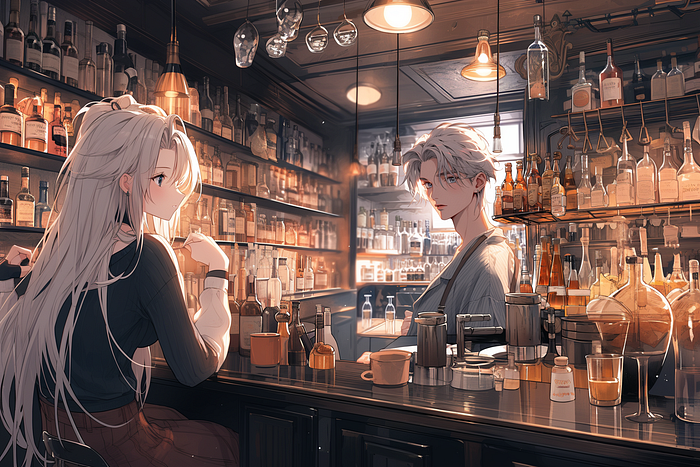
This is one simple way to achieve consistency. However, this method presents a disadvantage having a character always remains in the same position.
So, here comes an alternative method that involves more specific prompts and tricks.
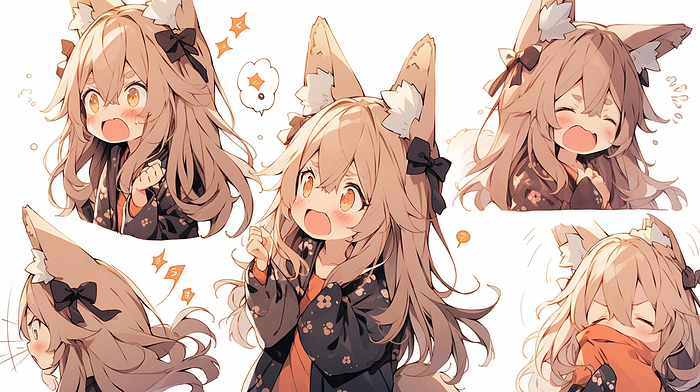
Part 3: Create A Consistent Character with Multiple Expressions ( Advanced )
You can introduce variability or randomness in the character’s position and expression by incorporating specific keywords in your prompt.
If you are looking for more, I am sharing with you an advanced way in the next part.
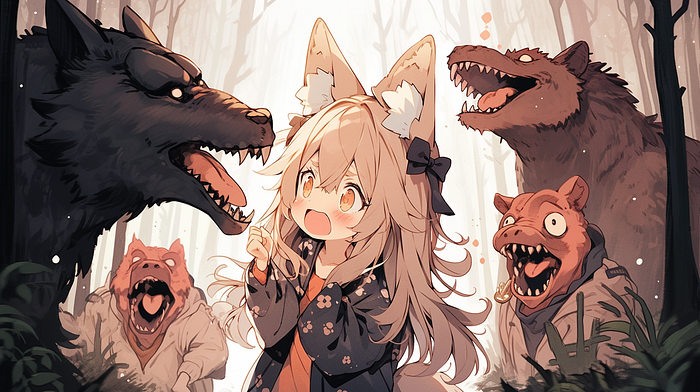
🌟 Keywords to include in your Prompt
To maintain consistency while also providing variation in the character’s position, you will want to add in keywords like “Multiple poses and facial expressions”.
By doing so, you can create a character with multiple expressions.
Prompt: A shojo anime kitsune girl, multiple poses, facial expressions, plain background
--ar 16:9 --niji 5 --s 180
1. Vary Region + Remix Prompting
After generating an image, you can change the surroundings with Vary Region.
Select all the other areas aside from the major character, and use “Vary Region” with prompts to regenerate the image.
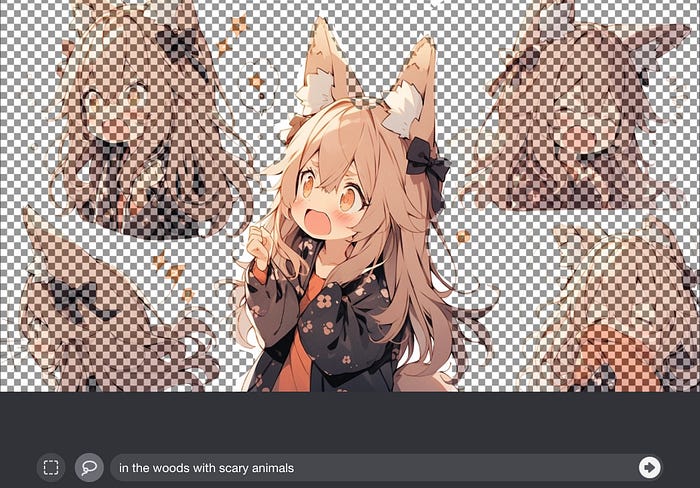
2. Next scene — Select Another Part and Regenerate
Next, we will want to select another expression for the next scene
Simply click the “Undo button” located in the top right corner to erase the selected part and make a new selection and edit the prompt.
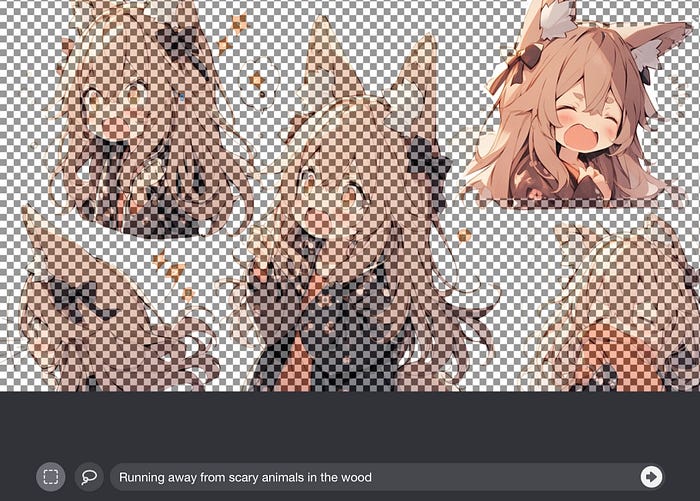
And here you go.
By repeating the same steps, we can create a whole storyline.
📌 Tip: Avoid adding to much details like the whole story script. Instead, describe exactly what happened in your prompt. Remember to keep it short and focused

Part 4: Character with a Coherent Movement
“Here’s a trick for crafting captivating action scenes: try using the following keywords to create a seamless flow of poses in a narrative sequence:
- Coherent action
- Narrative sequence style
This is great for action scenes as the movement is coherence
It’s perfect for crafting stories when you want the movement to feel fluid and exciting, especially for action scenes like dancing, fighting or even eating.
Step 1: Generate An Image
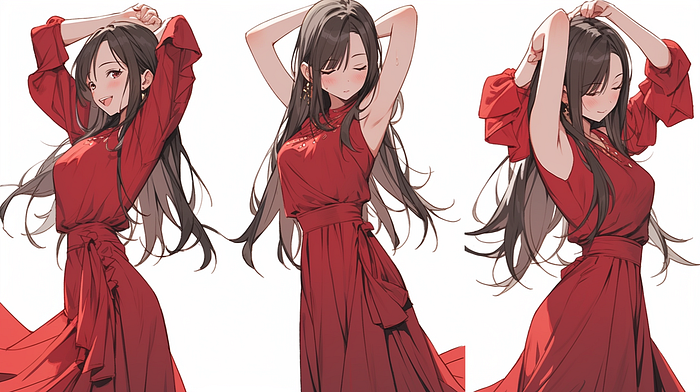
Prompt: Coherent action of a beautiful young lady dancing, in a red dress, multiple poses, facial expressions, coherent action poses, narrative sequence style, plain background
--ar 16:9 --niji 5 --s 180
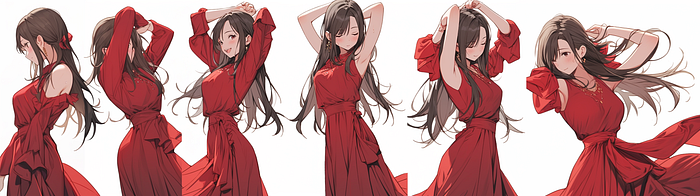
Step 2: Extend with “Pan”
You can use “Pan” to further extend your image and actions.
Step 3: Extract the characters
With this method, you will need to remove the background and place the characters in your scenes.
Use an AI tool to remove background easily
Simply follow this format
Coherent action of [ your character ] [ action ] , [ details of her outfit and style] , multiple poses, facial expressions, coherent action poses, narrative sequence style, plain background
Give it a try and see your action scenes come alive!
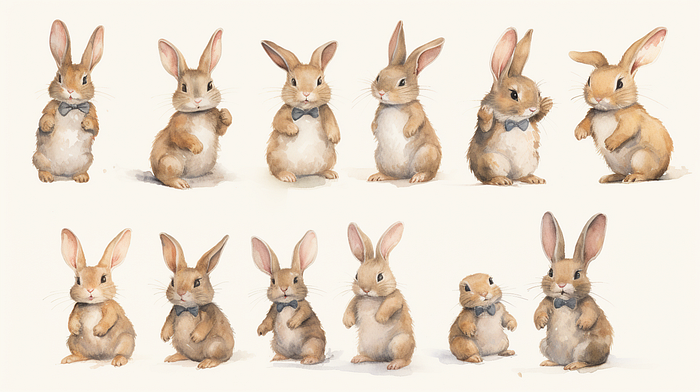
✨ Default Midjourney Mode
Note that the above technique is also applicable to the normal Midjourney mode with different art styles like this below.
You can also add the word “cartoon style”, “Pixar” and different art mediums in your prompt.
Prompt: Vintage watercolor, a bunny with multiple poses, facial expressions, plain background — ar 16:9
If you want to push it a little further to define specific poses and expressions, Morten Staveley recently published an amazing article that utilize the “The Character Sheets / Vary (Region) Method” with Midjourney.
Extra: Swap Face with InsightFace
Another way to do by utilizing InsightFace to swap faces. You can create as many images as you wish, and swap the faces of the images.

For detailed instructions on how to easily swap faces, please refer to this article.
Hi👋 I am Christie — a multimedia designer and AI fanatic.😊
I hope you found value in this article on tapping into AI or unlimited creativity. If you’re craving more insider tips, prompts and tricks for tools like Midjourney, I’d love for you to join me on this journey.
🎨 Hit that “Follow” button to stay in the loop for more AI wisdom
💌 Stay tuned for future updates
Let’s explore the limitless possibilities of AI together. The future awaits. Let’s seize it! 🚀

