What is the difference between low and high fidelity prototypes?
Types of prototypes. Who is responsible for creating them?

If you are interested in design, user experience, and setting business goals of products, you probably have heard about the importance of creating prototypes and their significant role in the design process. Most of the basic courses can provide insight into the prototyping for the junior designers. In this article you can get answers to such questions:
- What is prototyping?
- At what stage should you create it?
- What are the different types?
- What are the goals?
- Who should I show prototypes to?
- Which tools can I use?
So, let’s start from the beginning 😁
A prototype is an incomplete model of a site or application that allows a designer to monitor a certain process on users. Prototyping is mostly used for testing new features and basic design concepts.
In the case of digital products, prototyping is a visualization of the final interaction between the user and the interface.
Low fidelity prototypes
This is the initial view of a future site/platform/application. The testing of this type of prototype is carried out at an early stage of the design process to confirm that the concept of the product is correct. It is also a good way to ask users about heir vision of the product, certain block, or flow.
There are two types of prototypes: paper and digital.
Paper prototypes — are freehand sketches made on paper. Don’t underestimate this kind of prototype. Many excellent websites/applications/platforms begin with the paper. I like to use Sneakpeekit to choose a prototype template and just print it.

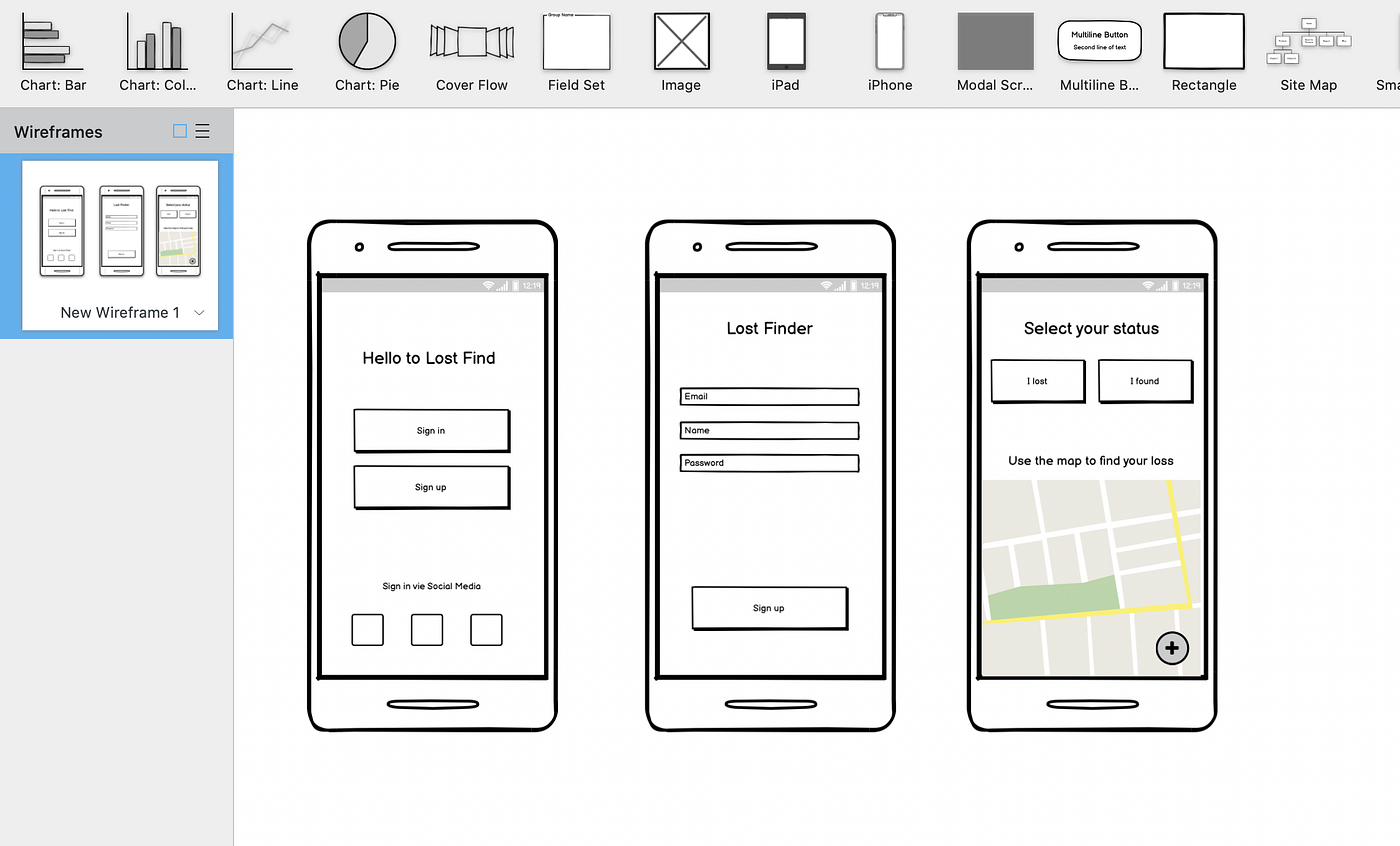
Digital prototypes are created in special editors for prototyping. Many tools specifically imitate the style of a sloppy drawing in order not to focus on the appearance of the picture, but to highlight the structure of the project. This way helps to understand the comprehensibility of a certain idea for users. These sketches represent blocks on pages, transitions, and basic functionality.
Prototypes are tested on the target audience. It isn’t recommended to test prototypes on friends and colleagues, as they may not be your target audience or they may have professional deformation. This way the results of prototyping can be distorted. After testing prototypes, specialists summarize the given information and look for ways to improve the functionality.
Advantages of using low fidelity prototypes:
- no need to spend a lot of time on prototyping;
- more opportunities to edit the prototype, as it will be easier and won’t take a lot of time for change at this stage;
- make it clear whether the concept of your project is clear to users;
- low-fidelity prototypes put less pressure on users. They can feel more relaxed and express their views in more detail;
- the intermediate stage of the design will be available for stakeholders, so they will not expect the complete design immediately;
- a good understanding of the product and users.
Note: You will likely take longer to create a paper prototype than a digital one.
Major mistakes:
- it is better not to use color for low fidelity prototypes. It will distract user attention. So, you risk wasting your time on doubts while choosing and discussing the palette;
- do not detail the prototype, the concept is your priority;
- it is important to test prototypes with more than 7 people. This way the conclusions about the concept will be more objective and detailed.
Who is responsible for the prototype creation:
- UX designers
- UX / UI designers
- Product designers
- Marketers
Digital Prototyping Resources:
High fidelity prototypes

This kind of prototypes looks like a finished product with pixel-perfect elements. It can be created as a high-quality interactive prototype or as a developed HTML/CSS pages. I prefer the first option of doing it as it has lower efforts and involves designers only. This option also saves time and money that can be spent on the template designer.
Digital prototypes are the most common form of hi-fi prototyping. Nowadays, the variety of specialized software allows designers to create visually rich, powerful prototypes full of interactive effects and complex animations. — Adobe Blog
High fidelity prototype is tested on users to check whether the interface is intuitive, whether they study hypotheses, test design for compliance with accessibility requirements for people with different types of visual impairment (sometimes it calls “Accessibility testing”).
After testing the high fidelity prototype, the results are approved by the customer/product owner and then transferred to the development.
Benefits of using high fidelity prototypes:
- you can test not only the functionality but also UI components — menus, filters, input fields, graphic elements (icons, photos, illustrations, animation)
- possibility to get more detailed conclusions about the certain site due to the high accuracy of prototypes
- ability to test all current hypotheses
Main mistakes:
- you don’t have to help users by telling them how to use the site. Let them make their own decisions. Your task is to observe, and then understand why they made such a choice
- you cannot come for testing unprepared. You should always have a list of questions that you may ask users after testing
- you shouldn’t give users a site with the task «click something on the site and say what you don’t like». All flows for testing need to be carefully worked out. It is also important to describe the target audience for a certain flow and problems that should be solved by the users on the site.
High-fidelity interactivity frees the designer to focus on observing the test instead of thinking about what should come next. Nobody needs to worry during the test about making the prototype work. —Nielson Norman group.
Who is responsible for the prototype creation:
- UI designers
- UX/UI designers
- Product designers
Prototyping tools:
What to do after you have tested prototypes:
- while observing users, note any signs of unusual behavior. If you have any questions — ask users after the test.
- ask users if the prototype was clear enough for them. Did the prototype meet their expectations? (especially high fidelity)
- what part was difficult to cope with? At what stage it was difficult to deal with the interface? (high fidelity)
- did the user expect to see this particular visual design? (high fidelity)
In conclusion
Prototypes are divided into two categories: low and high fidelity. Low fidelity prototypes are used by designers in the early stages of the project to make sure the content is correct. High fidelity prototypes are created at later stages of the design process to test all current hypotheses. Do not forget to interview respondents after testing with previously prepared questions.

