Making a 3D model out of a watercolor painting
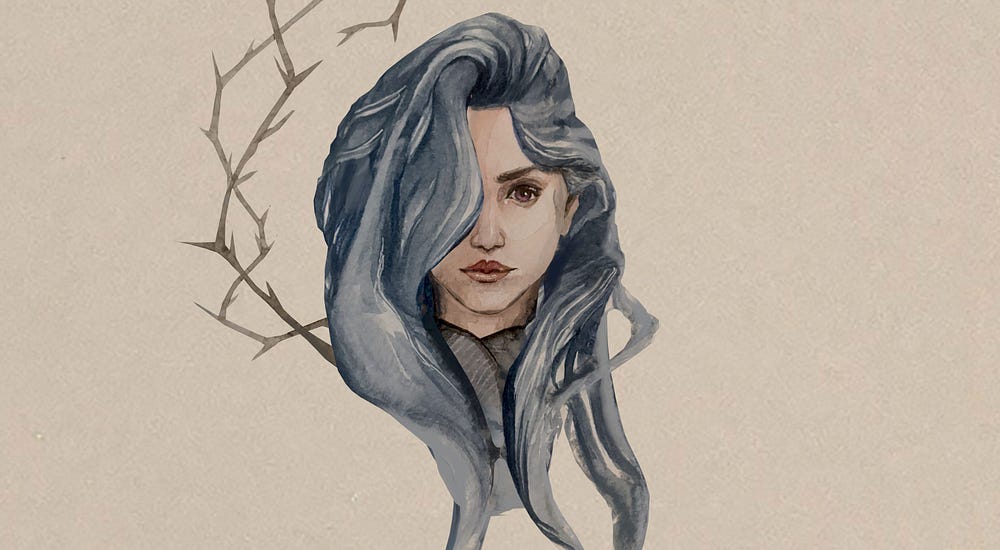
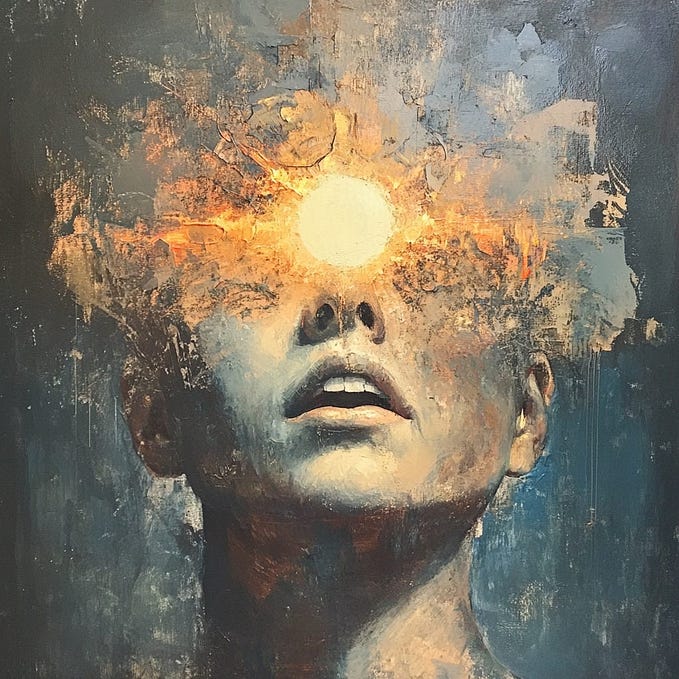
A short walk through of a little hack on how to convert a portrait painting or a drawing to a 3D model with little texturing or the usual hassles such as proper unwrap. For this I am using Blender, although you could use any software. As the base I am using this painting by Ninoriel. You can view the model on my Sketchfab.
Yesterday, I watched a fantastic talk by Ian Hubert, titled World Building in Blender. In the talk, he talks about how he uses projection mapping in VFX to quickly get very acceptable environments and probs. I wondered if I could do the same thing with drawings and portraits, to be able to quickly get a 3D model that has a hand painted feel to it.
I am quite happy with the results. Although if you inspect the model closely, you would see all the typical projection mapping artifacts, considering the fact that this entire model from begining to the end took under an hour to make, I would say the hack works. You can of course still go in and fix those artifacts or fix them using other means which I will go in to at the end of the article.
Also you can use this hack to get a proxy geometry for relighting your painting. It looks quite cool when lights move around the model when the camera is in orthogonal mode. It looks like a magical painting.
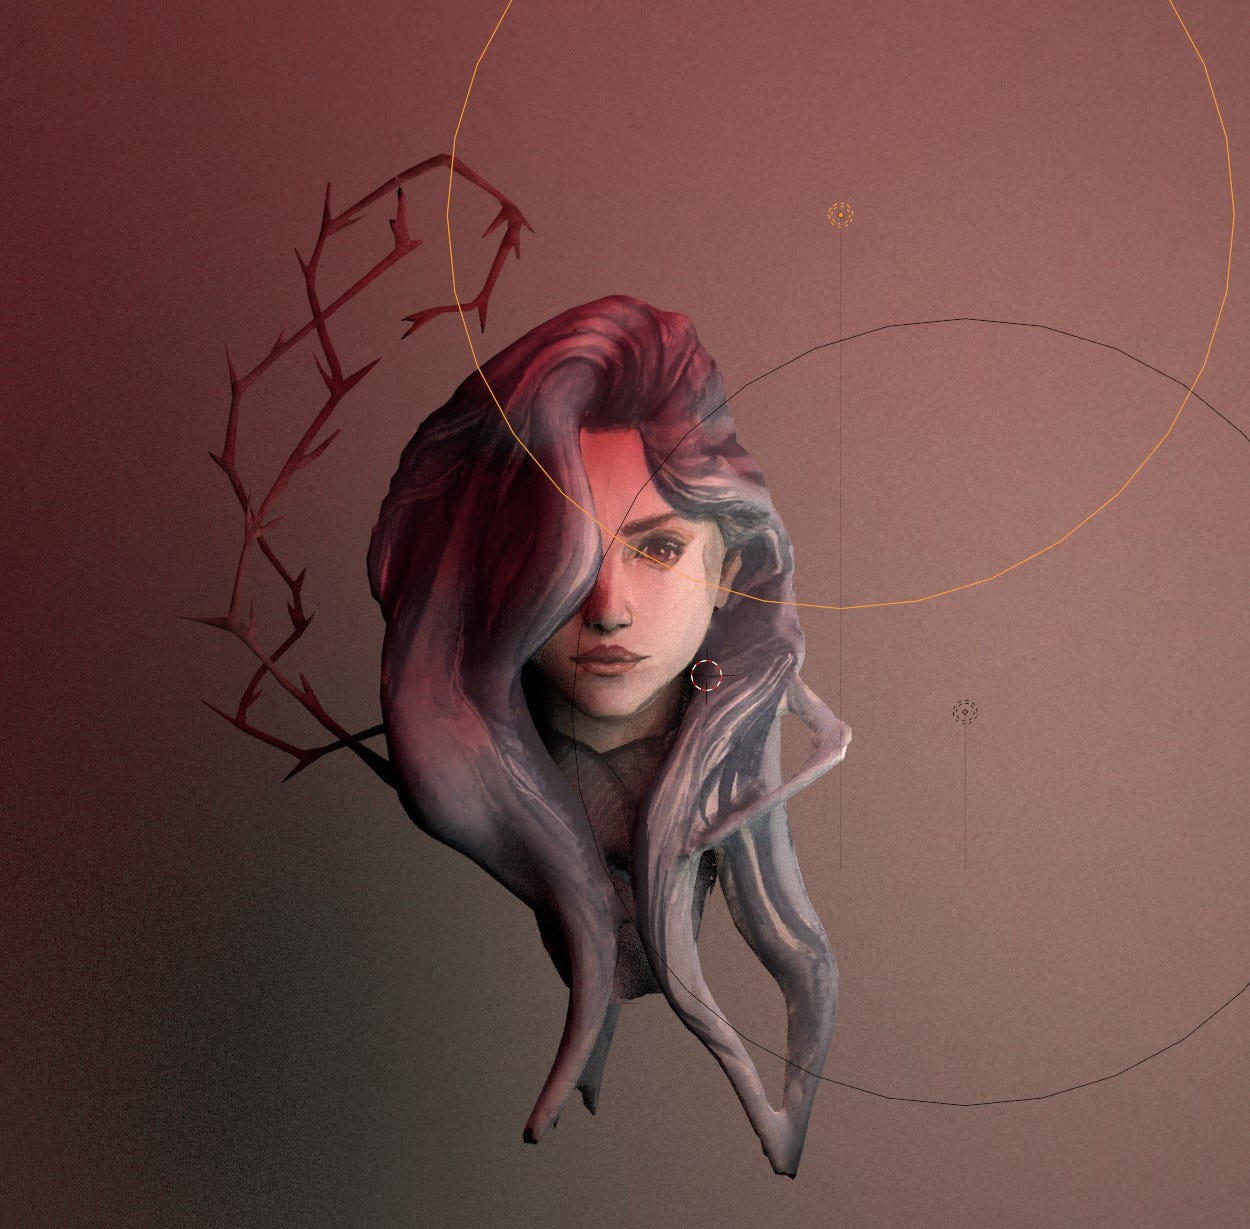
And if you have a good head model that is ready for rigging, you can very easily animate your drawing.
But first, a quick step by step.
Step One: Find Your Image
First, choose a portrait you want. I choose this one by Ninoriel.
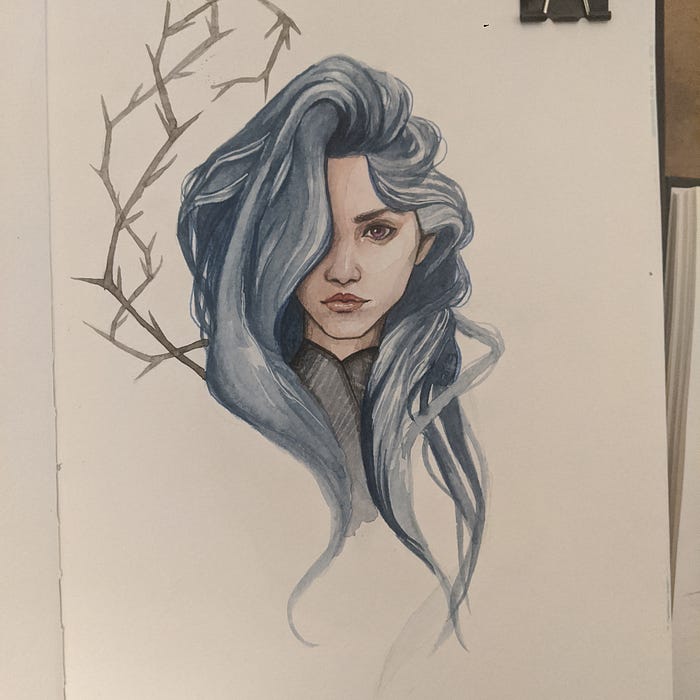
Step Two: Make Proxy Geometry
Import your image as a reference in blender and model or sculpt a proxy geometry that resembles the painting as a base to project the texture on. This doesn't need to be 100 percent exact, or even good topology if you want to keep the model unlit, as the texture of the painting hides the topology under it. Alternatively if you have a head with good topology laying around or can find one online, use that one and just deform it until its silhouette matches the painting. This also doesn't have to be 100 percent exact as you can correct for deviations in the unwrapping section.

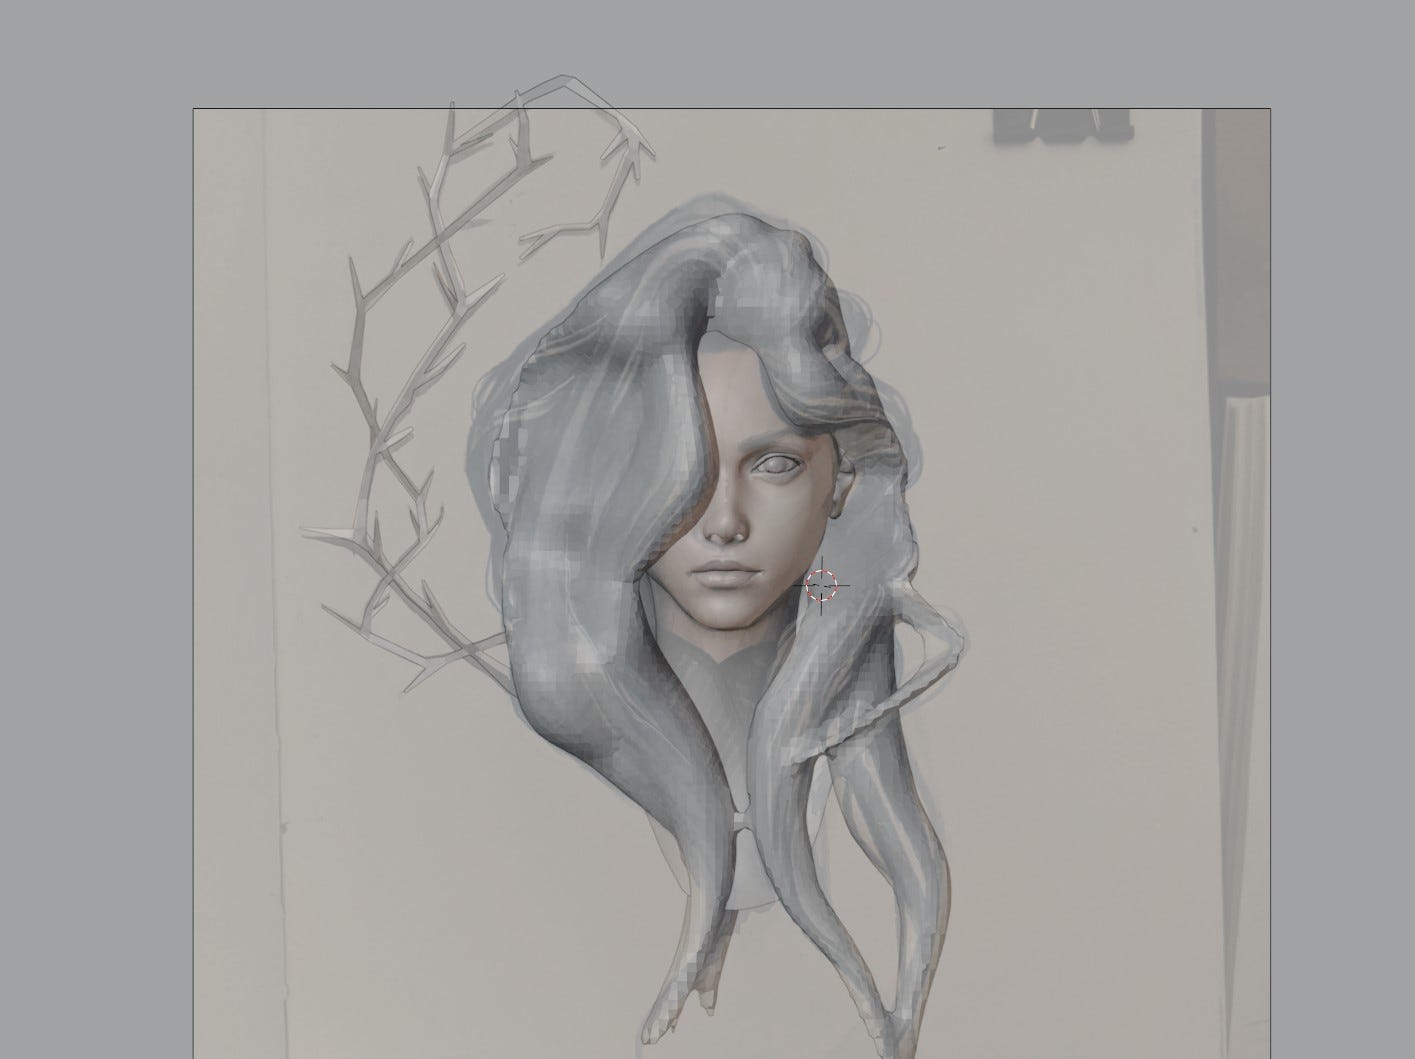
Step Three: Unwrap For Projection
Press 1 to switch to the frontal view (or if your image and model is orientated differently, press 5 to switch to orthogonal view then navigate to whatever direction your model is facing), and then in edit mode, while you have everything selected, under UV drop menu select Project from view. Then open your UV editor, and start scaling/ rotating and translating your big islands until they match the underlying image.
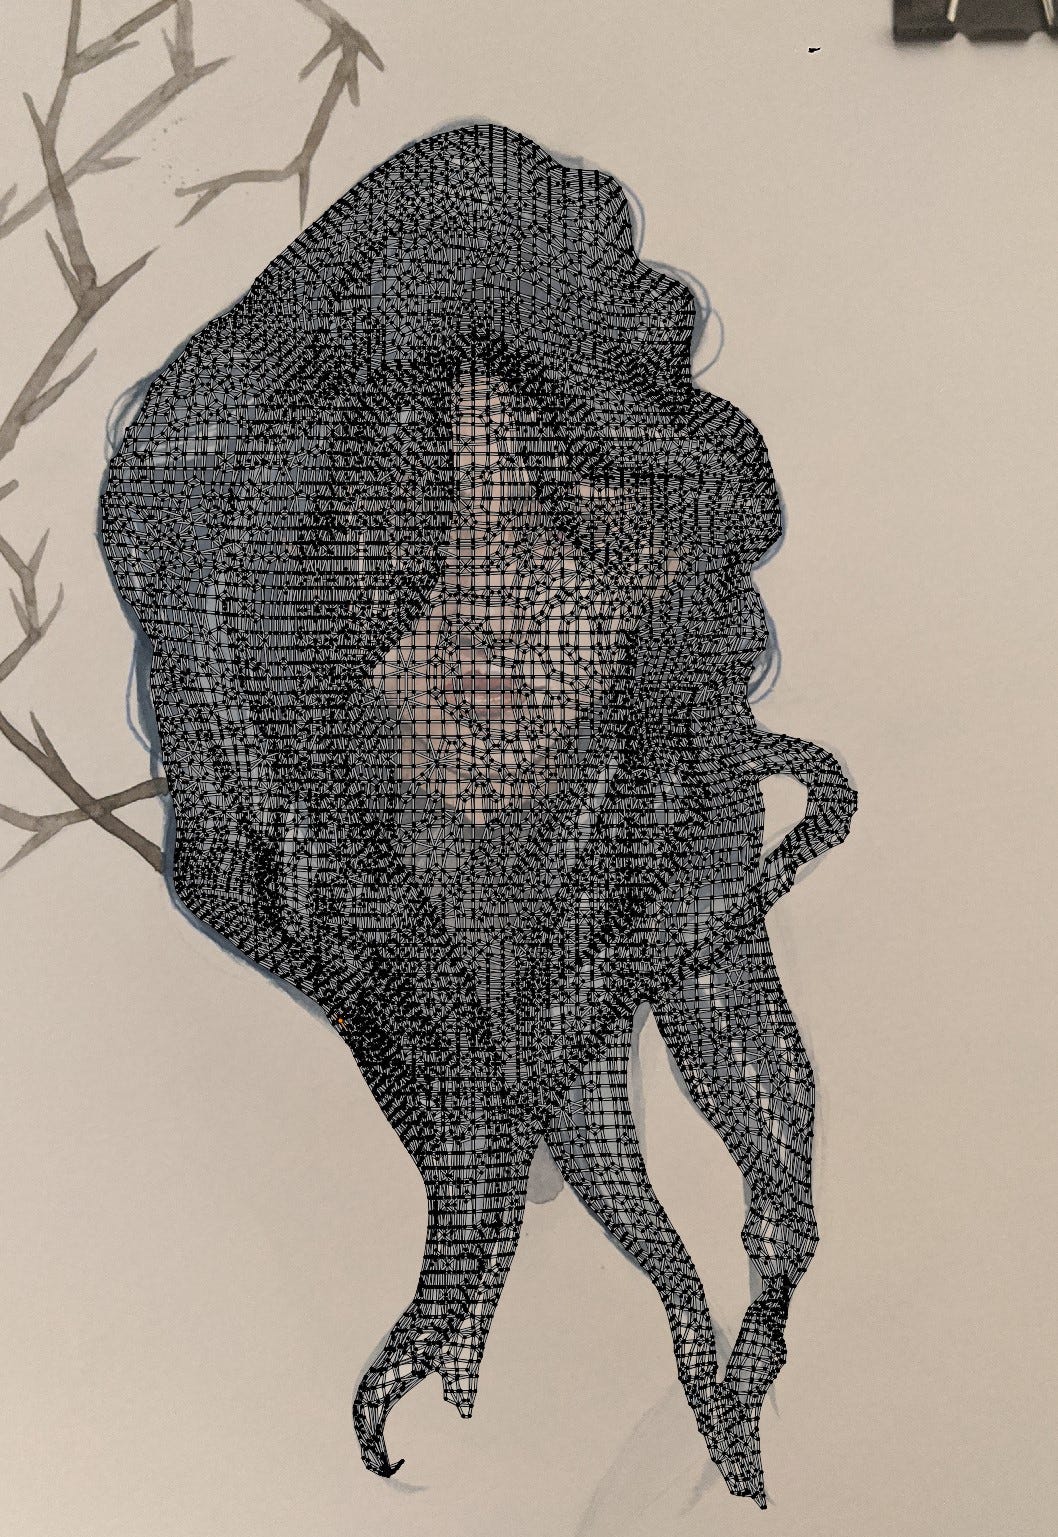

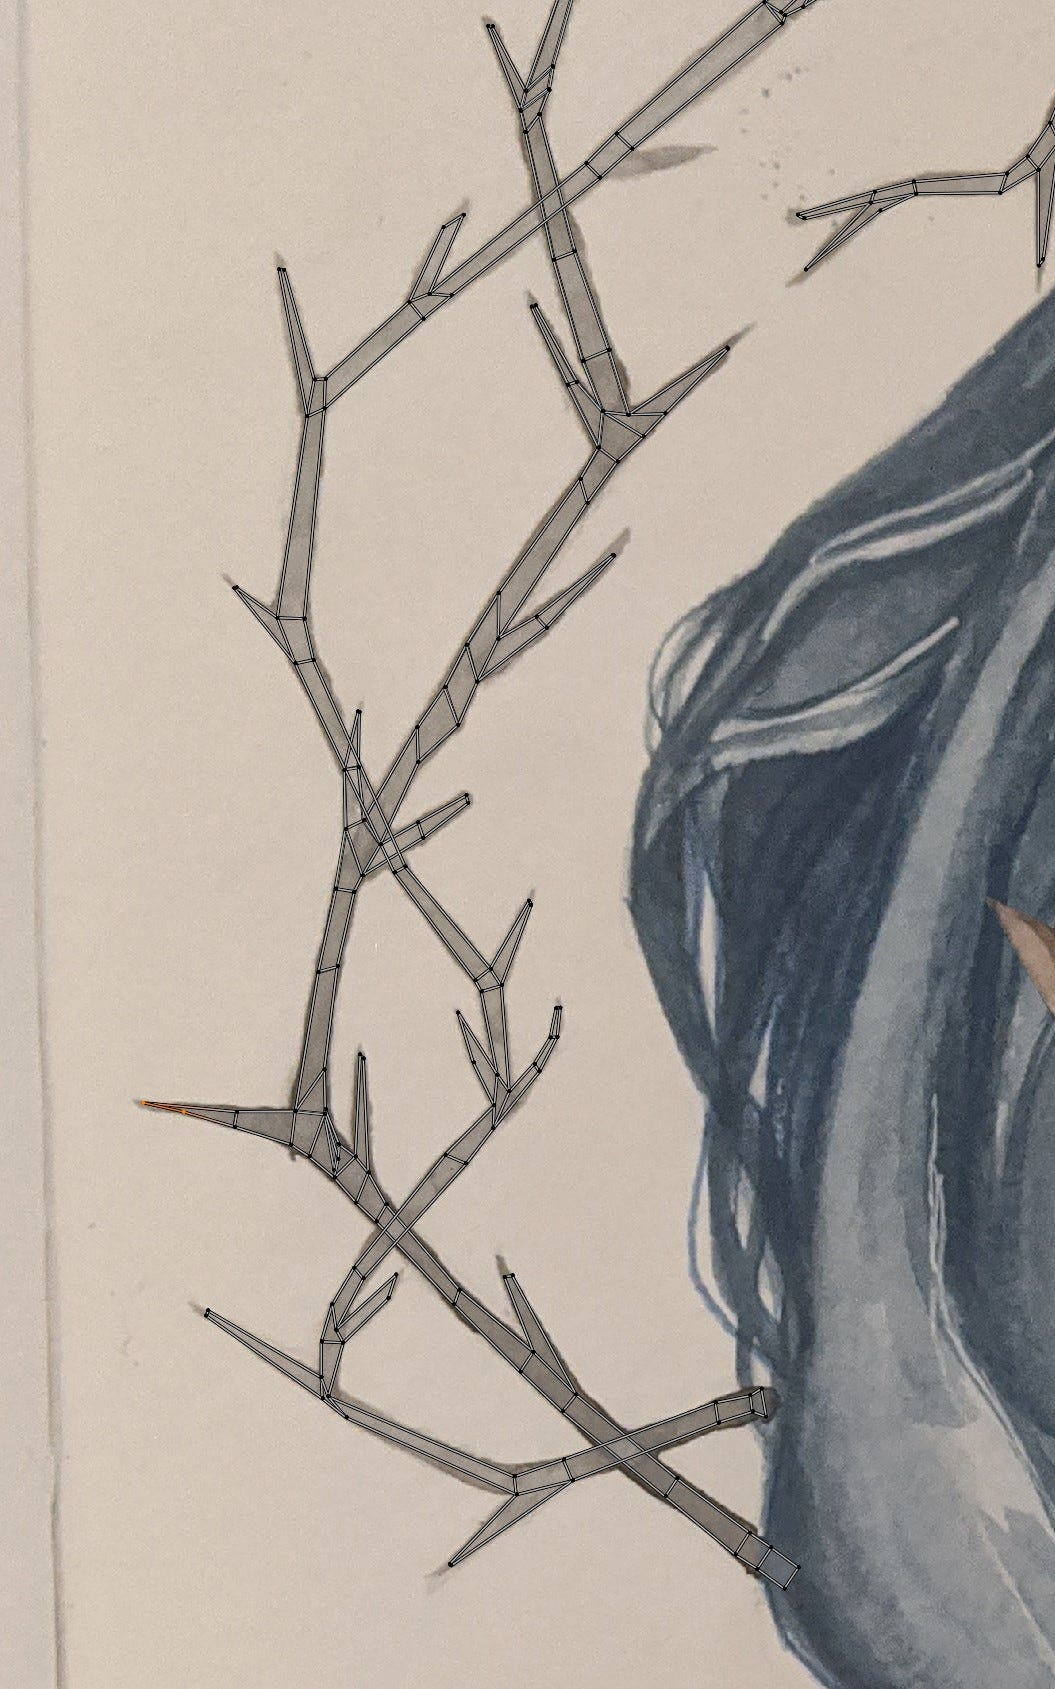
At this stage, if your silhouette has small deviations from the painting, just grab those vertices in the uv editor and move them around with soft selection until everything aligns nicely.
Step Four: Setup Your Material
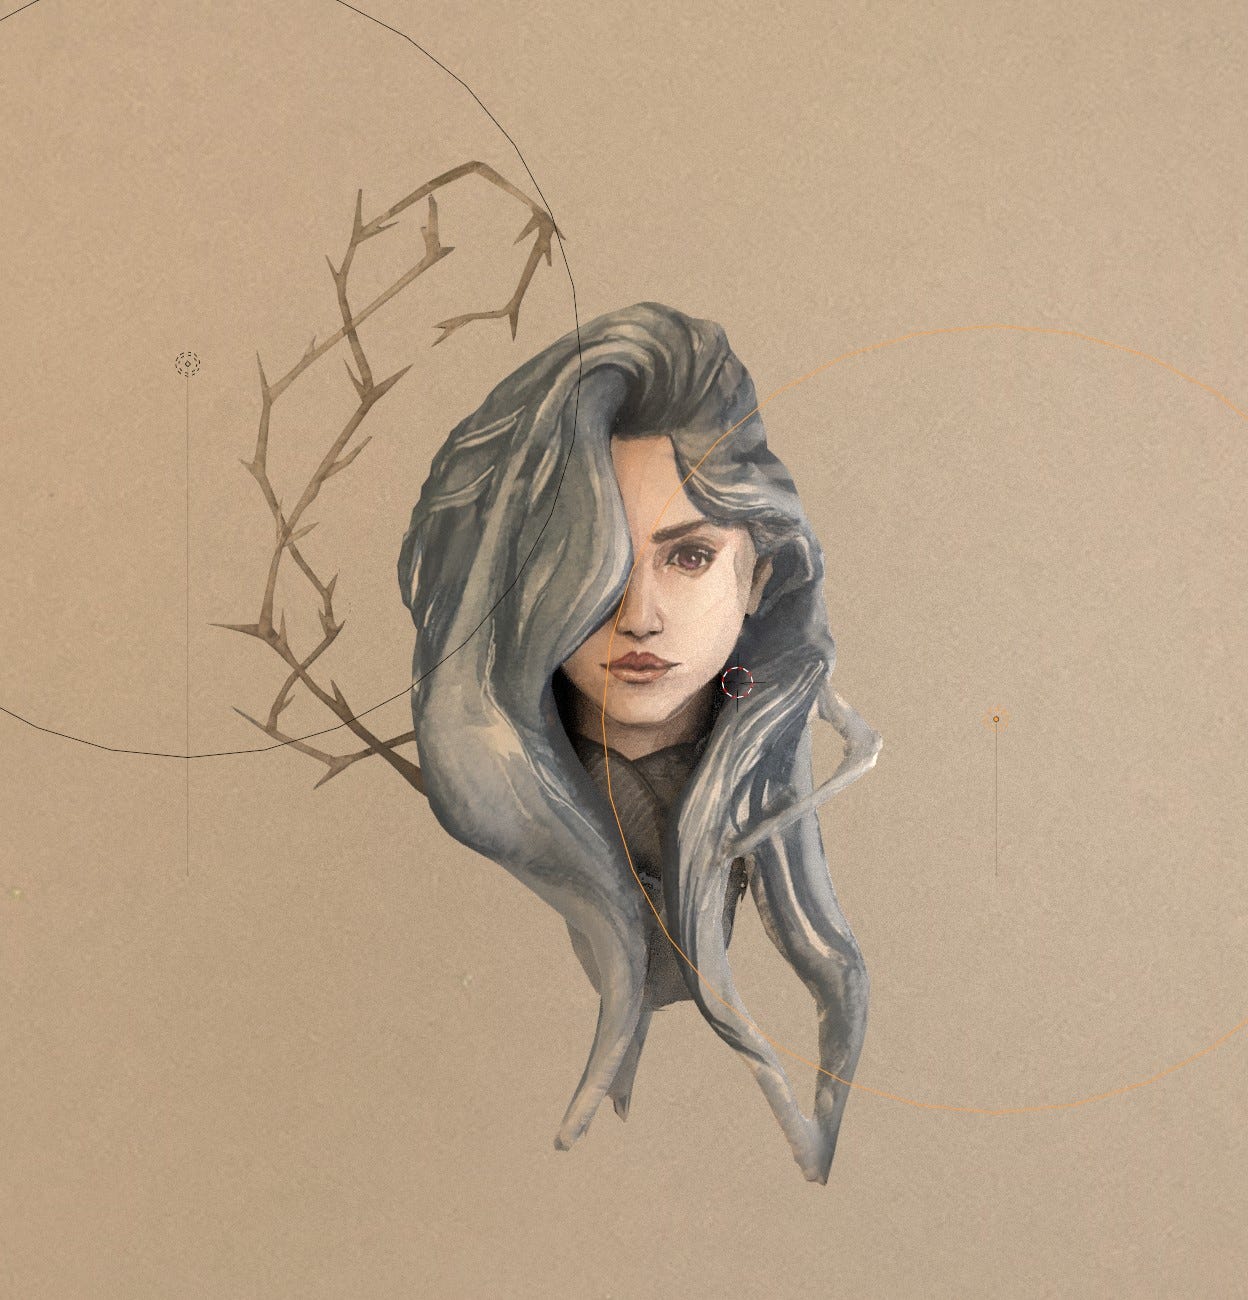
Now create a material for your objects/ or object, add an Image Texture Node and directly plug the out put of it to the surface section of your material output. This will act as an unlit shader that simply show cases the frontal image we have. At this point, you should see something like this.
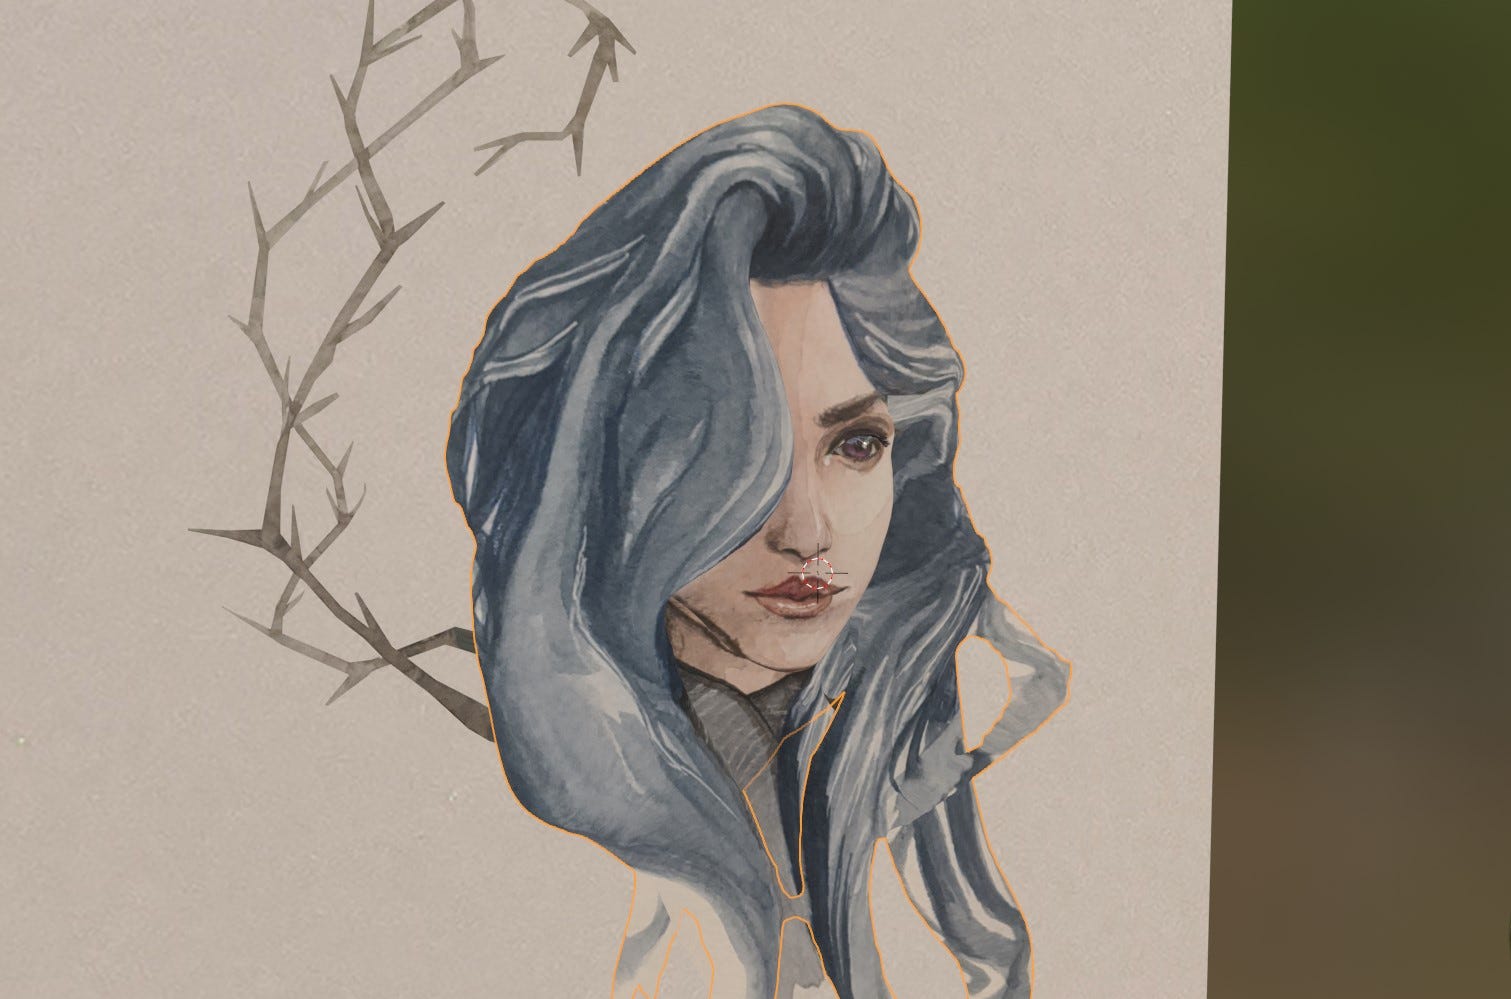
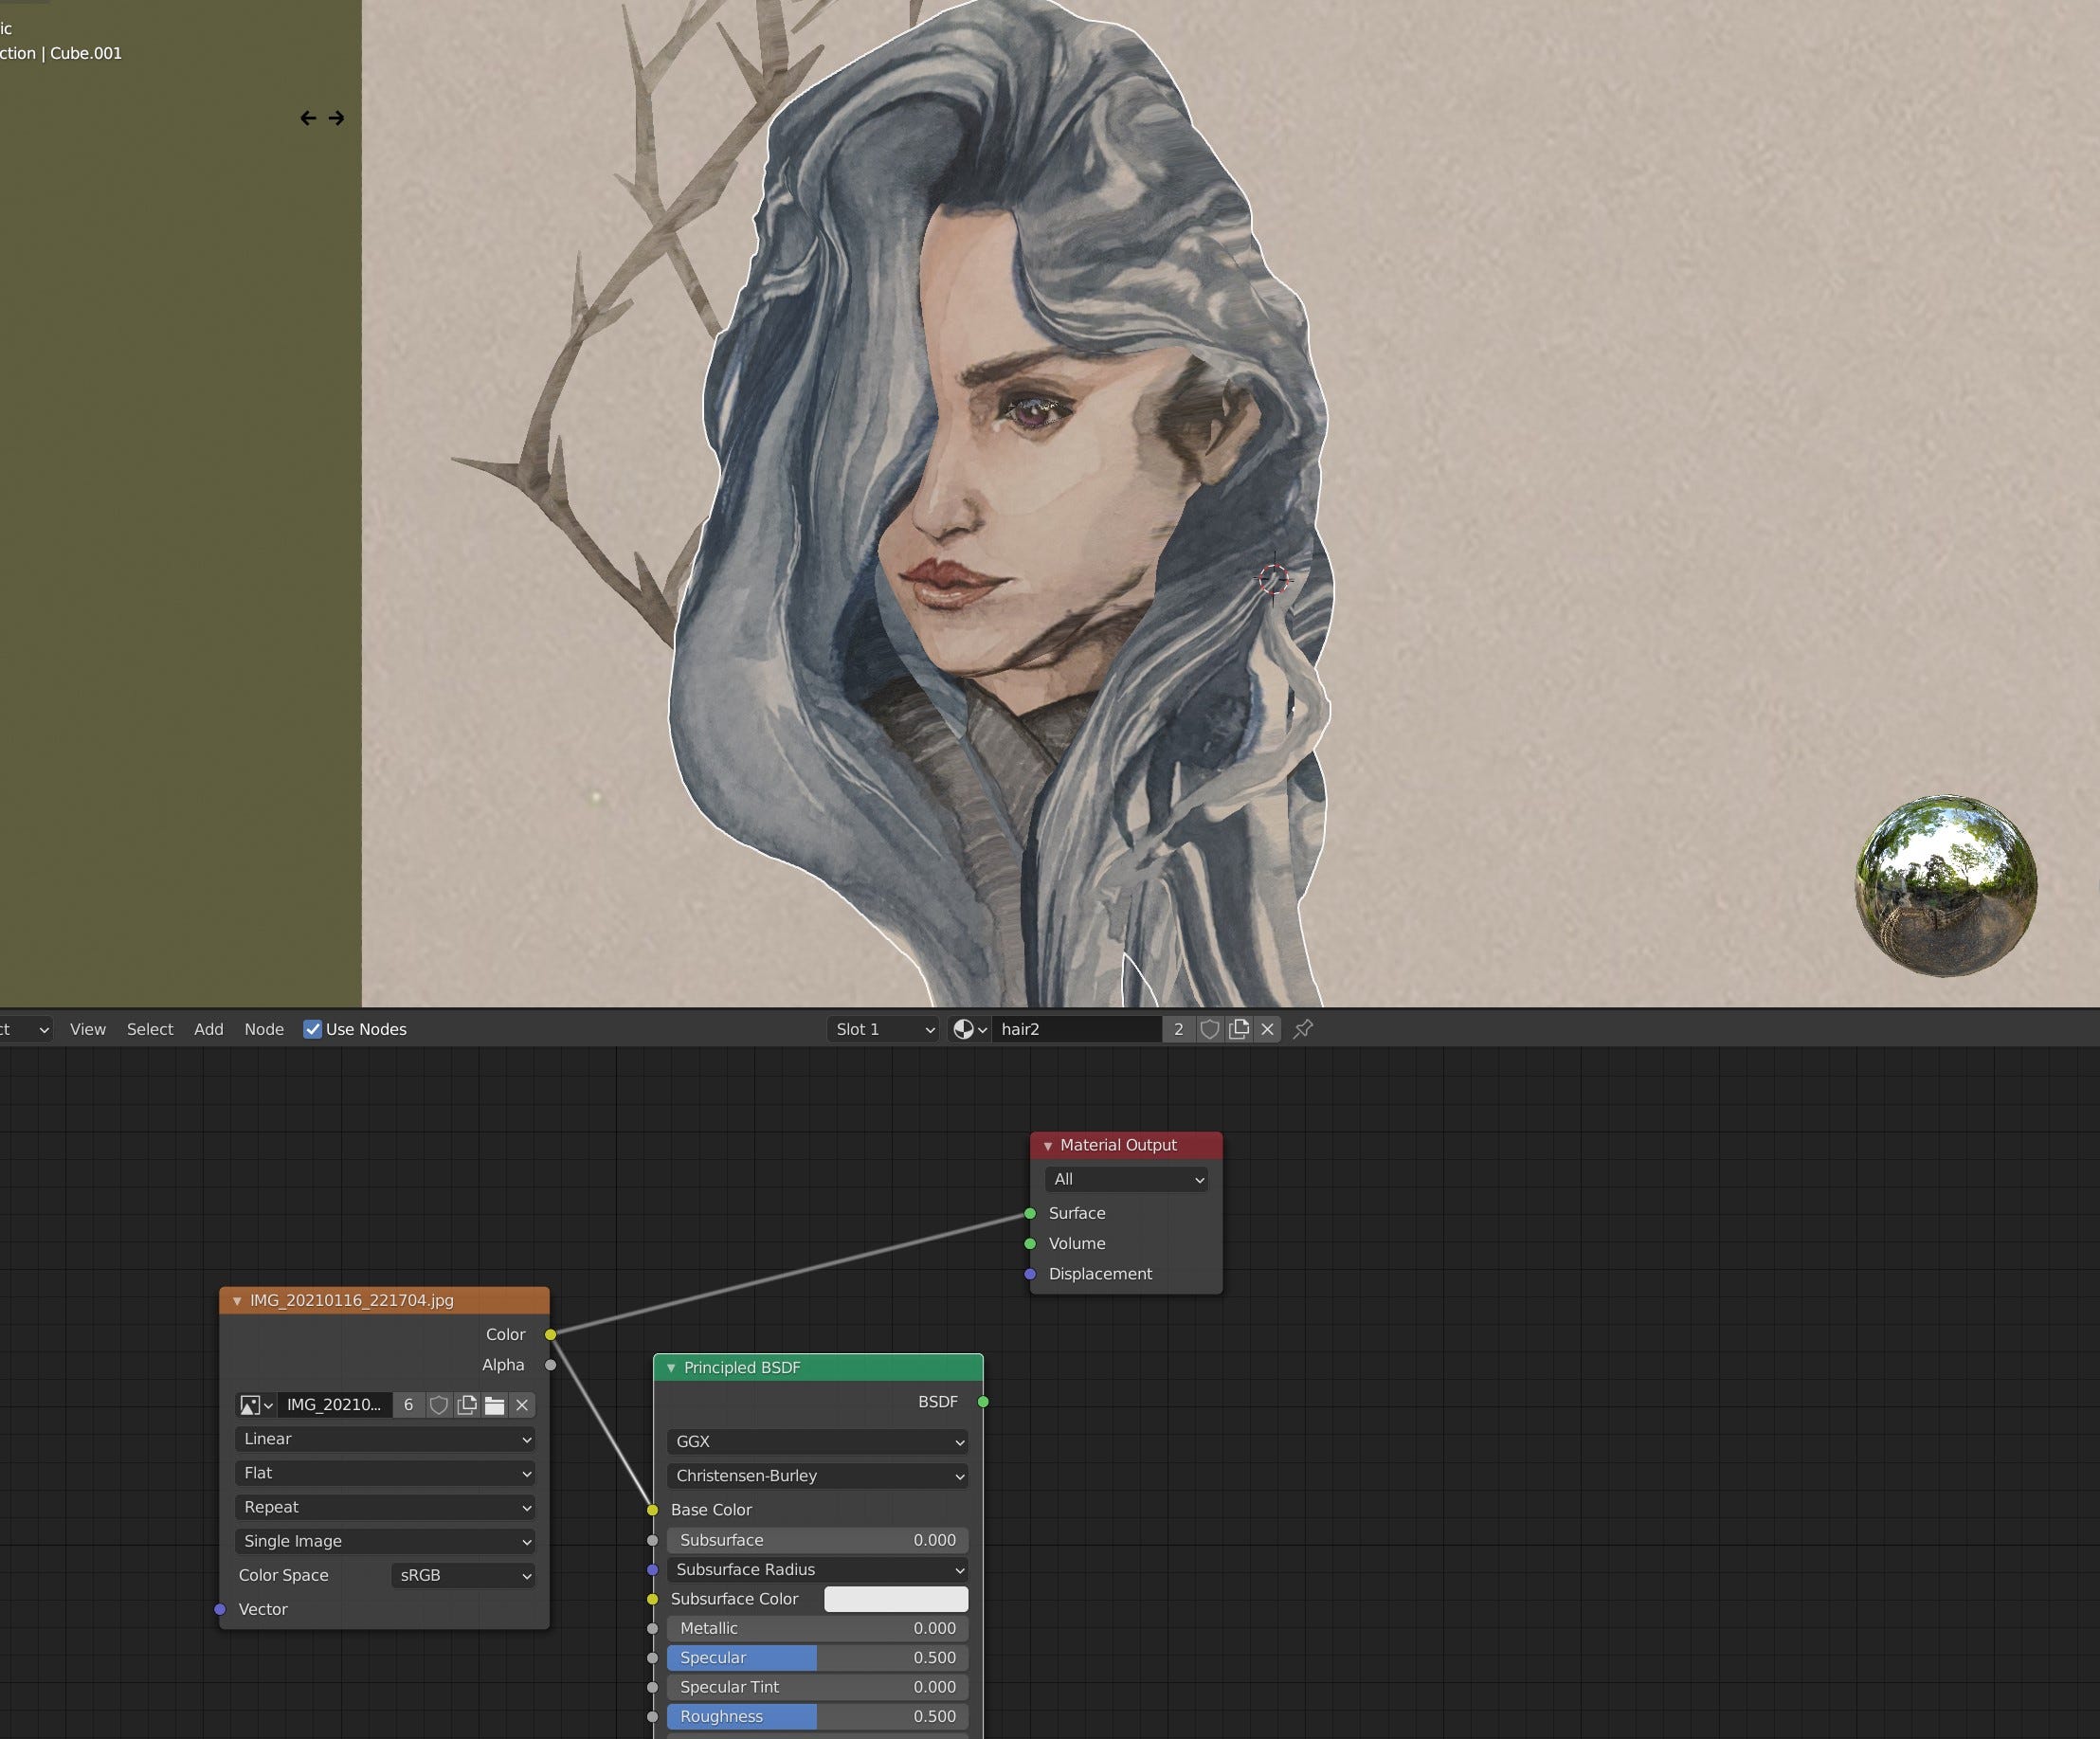
Already pretty good for 30 minutes of work. Of which 25 minutes of was modeling the more complicated hair, if this was a bald guy, you would get here in 5 minutes. But now time for the bonus steps for setting up the mesh in a way so that you are able to fix the projection artifacts.
How To Fix the Artifacts
To fix the artifacts, you have to go over the areas where smearing is happing, with either the clone tool or with a brush. The issue with the current setup and the unwrap is, that several islands can share the same space. For example, since we are unwrapping by projecting the faces on to the camera plane in the frontal view, any face that lays on the same axis in the cameras line of direction (anything that overlaps from the point of view of the camera), will have the same space. That is why the face is also projected to the back of the hair:
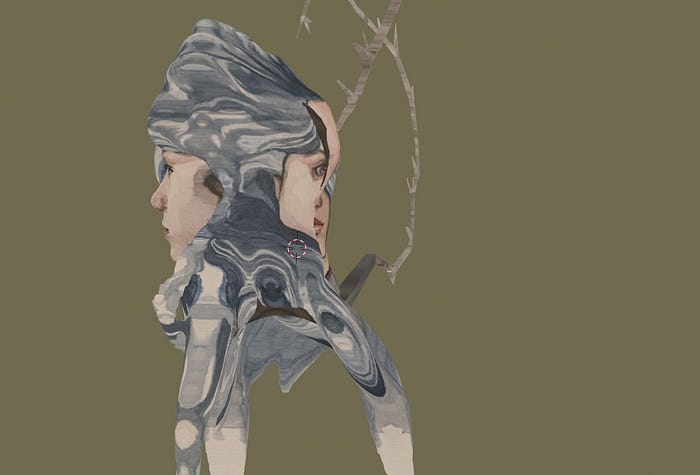
So if we were to use the current unwrap for texture painting, anything we paint at the back of the head, will also effect the face itself, since those triangles share the same uv space, where the texture is saved.
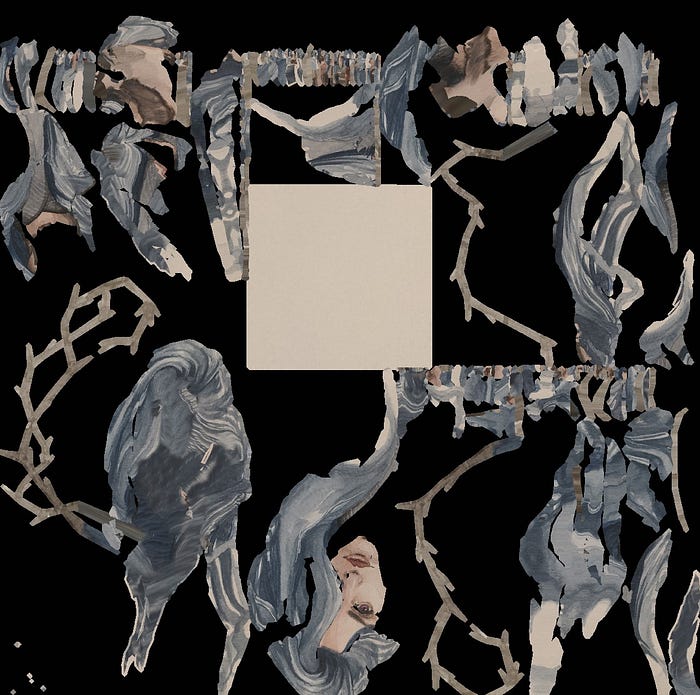
What we need is a uv where each face has its own unique space, and is not overlapping with any other. However, we would also like to use the projection mapping results as a base. The solution is to bake the projection mapping results in this new uv, and simply use that for our texture fixing. So here is that workflow step by step.
Step One: Set Up a Duplicate Object
First thing I do is to duplicate the object. While you can bake on a second uv without doing that, I duplicated the object, because I wanted to remesh and decimate the mesh as well since I was baking anyways. Remeshing helps, because intersecting geometry are changed to closed surface and we dont waste time rendering triangles that are completely covered, and decimate because of performance reasons, both for rendering as well as doing unwraps. For previewing here, I am putting the original and the duplicate side by side, but in your case they should overlapped perfectly, so don’t move the duplicate.

Step Two: Do a Unique Unwrap
In edit mode, select all your vertices and under the UV drop menu unwrap with the smart uv project. This will automatically create your unwrap for you. Although the smart uv doesn’t guarantee that faces have unique spaces, in my experience, for lower angle threshold such as the default 66, it almost always does. If the smart uv project fails at creating a unique uv (you will know that once you bake, certain faces bleed across large distances into others), then you could try the lightmap unwrap in the uv drop menu. That one takes longer, so make sure your mesh is low poly.

Step Three: Bake
Once you have your unique unwrap, get rid of all the materials in the duplicated object, create a new one and in it create an image texture node. There you can create an image where your bake results will be saved in. Then in your camera section, switch to cycles, go to bake settings, set bake type to Diffuse and untick the contributions of Direct and Indirect. Then activate the Selected to Active section and set a small extrusion value.
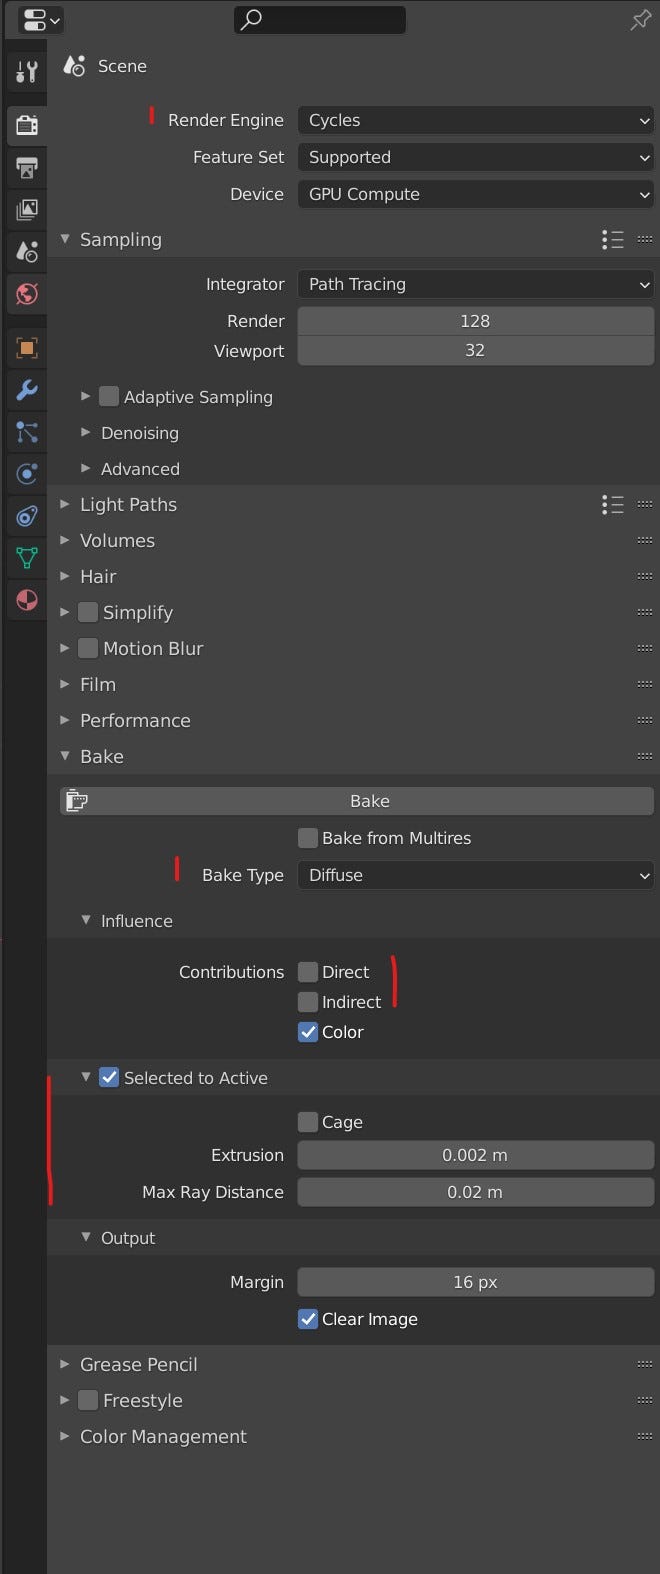
You are almost ready to bake, but before that make sure the original mesh you are baking from (the mesh that you duplicated from and has the projection mapping texture) has a principled BSDF shader between the output and texture, where the texture is plugged in the color. Blender takes only whatever is plugged on the principled shader for its baking of a Color diffuse map. Once that is done, Select the the original mesh and set the duplicated/ decimated mesh with the unique unwrap as active by CTRL selecting it. In the material of the duplicated mesh, make sure the image texture node you created is the selected node and press bake. Once you do that, you will have a normal UV space and texture you can fix either in blender itself or Substance painter.
Closing Thoughts
That is pretty much it. I think the merit of this experiment was how easy it was to get this painterly water color look in to the mesh, without hours of tricks and painting. One thing worth trying is, you might as well paint the character again in the same pose but from the side in water color, then create another projection mapping uv from the side, and blend between the two in blender. If you do that from all side, you wont have to texture a thing, just blending from each side and you get a beautiful hand painted looking mesh. And I suspect drawing the character from 3–4 sides and painting it with water color would still be way faster than getting the same level of authenticity in substance painter or using shaders.
As usual, thanks for reading. You can follow me on my Twitter: IRCSS

