Google forms as a free alternative for your tree test studies (Part 1)
A budget-friendly option for small websites with flat sitemaps
Information Architecture (IA) is an important aspect of the user experience of an application that has the potential to make navigation of its features a frustrating or enjoyable experience. Easy-to-understand labels, clear call-to-action buttons (e.g. log in) and logical nesting of menu categories contribute towards a friction-less navigation experience for the user. There are two core methods by which the IA of a website can be tested with users:
- a card sorting exercise where users group menu labels into headers that make sense to them
- a tree testing exercise where users are asked to find specific functions within a list of nested labels
Through a 2-part series, I want to explore using Google forms as an alternate tool for tree test studies.
In the first part of this article, I walk you through the process of setting up, a tree-test using Google Forms. In the second part, I’ll briefly discuss ways to analyze the results of such a test and list a few important aspects that you may want to consider while deciding if this tool is for you.
User Zoom, Treejack and UX Tweak are some of the custom tools out there to conduct tests for information architecture. Each of these tools let the researcher set up specific tasks that guide users/respondents through nested labels into specific destinations on a website or app. While there are free versions of these tools, tasks are limited and you typically need a subscription to set up a full-fledged study that can provide meaningful insights about your website’s information architecture.
Setting up the study
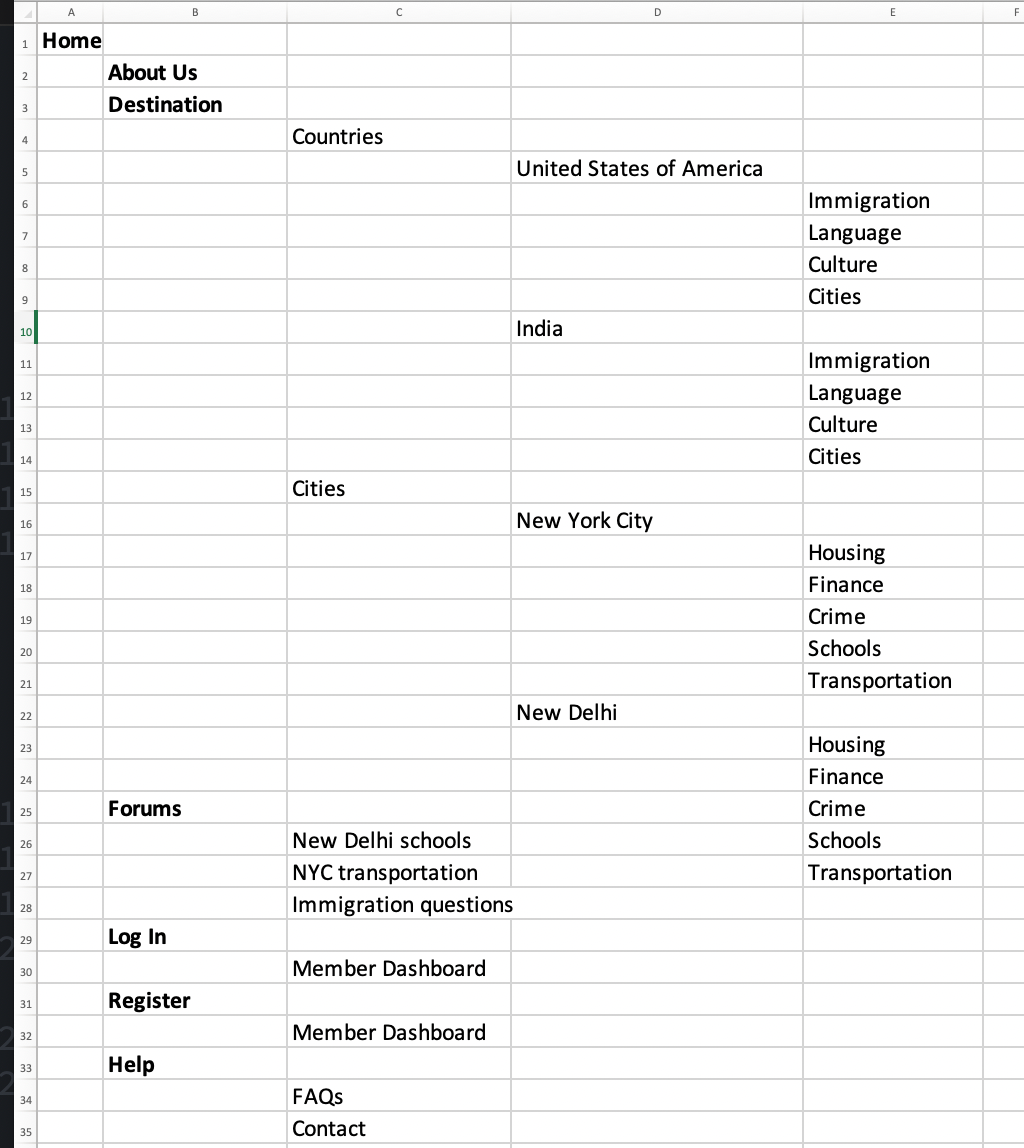
The first step towards a successful tree test starts with a clear and logical hierarchy of content categories for a website or a well-organized sitemap. A set of nested menu labels can be created from either of those artifacts.
For example, let’s take a concept website I created to help users relocate internationally. I had a sitemap diagram for my website on Miro, which I used to create a complete list of content categories and subcategories.

Writing Tasks
The next step is to write a list of tasks that you would like the user to complete. For example, I had three tasks for my relocation website.
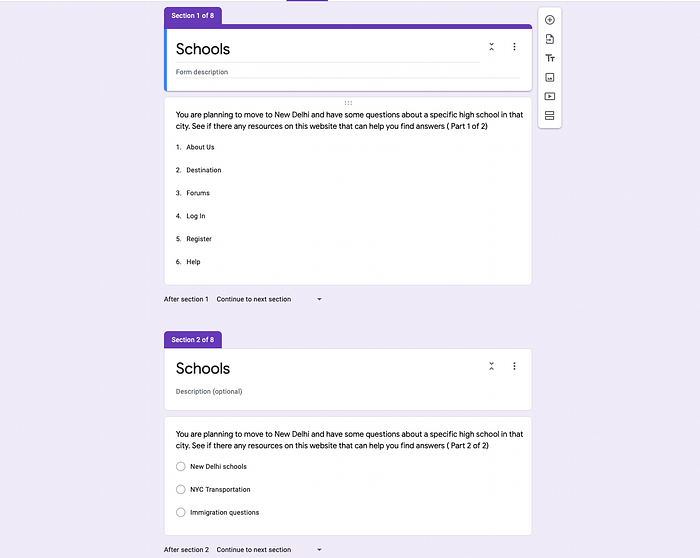
- You are planning to move to New Delhi and have some questions about a specific high school in that city. See if there any resources on this website that can help you find answers (2-part question)
- You want to know if it’s safe to relocate to the United States during Covid. Where can you read more about travel restrictions to the US? (4-part question)
- Find out how to be a member on this website (2-part question)
This article from the Nielsen Norman Group contains a section on how to write tasks for tree tests.
Setting up Google Forms using branching logic
Once you have the labels and the tasks, then you start by opening a new form on Google Forms. You need a Gmail account for this step. Now, depending on the number of tiers you have in your hierarchy, each question will have 2–5 parts to it depending on the hierarchy levels on your website (see list of questions above). However, I would recommend having two parts to every question — the intended destination and one tier above it. I’ll explain why later in this article.
If you have not used Google Forms before, you can learn how to do that here.
The key process to simulating a tree test is to set up tasks as survey questions on Google Forms in the following format:
- Each task will be a question with multiple parts
- You’ll have as many parts to a question as you have hierarchy levels
- Every part of every question must have a separate section. Each section will have only one question. If you are not familiar with sections on Google Forms, here’s how to do it
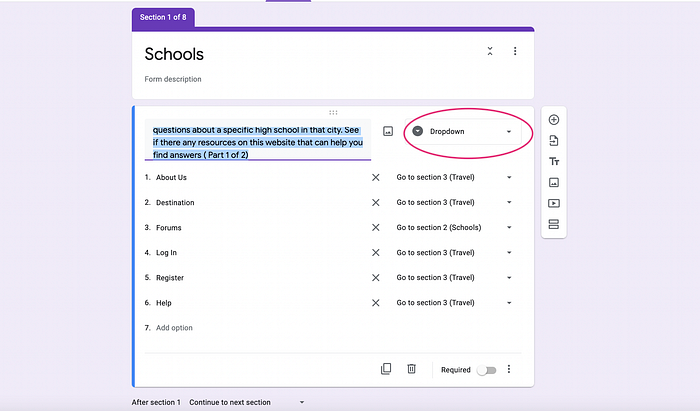
- Every part except the last will have a drop-down menu item
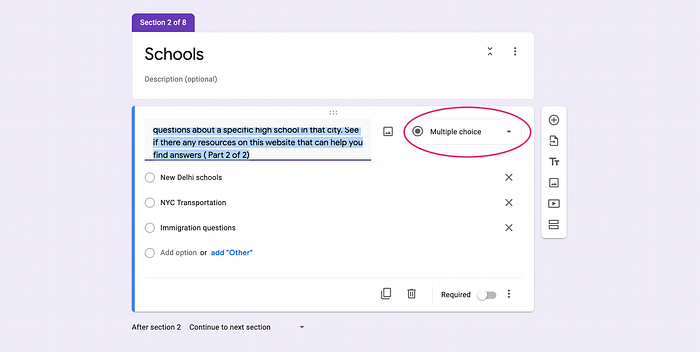
- The last part will be a multiple choice, one selection only question
Step 1
Once you have set up all questions and their parts in separate sections, you can start applying the forking logic on Google Forms to ensure that respondents are directed to specific sections depending on their answer.
Create separate sections for every part of each question you have on your test. Use the same name for all sections relating to the same question so that it becomes easier to direct users to relevant sections based on their answers. For example, if I have two parts to a question about schools, both sections will be named so.
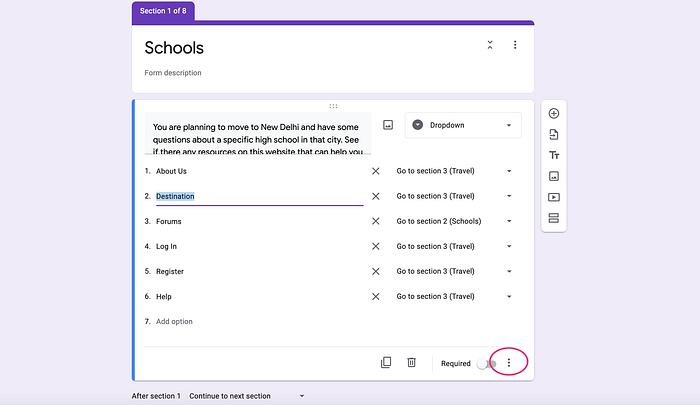
All question parts except the last one should be Dropdowns;the last part to every question will be Multiple Choice.
Step 2
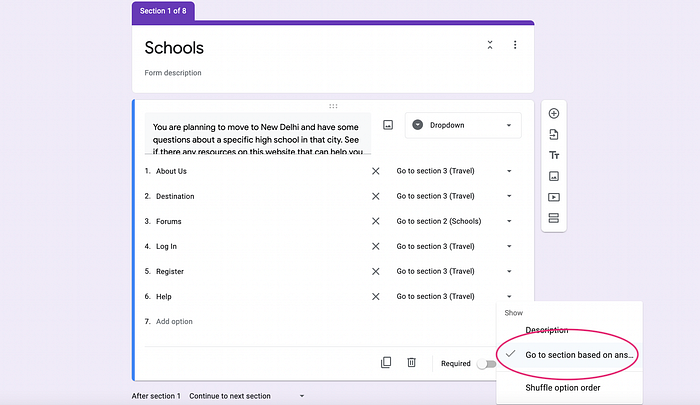
For all Dropdown questions, check the option on bottom right that says ‘Go to section based on answer’.
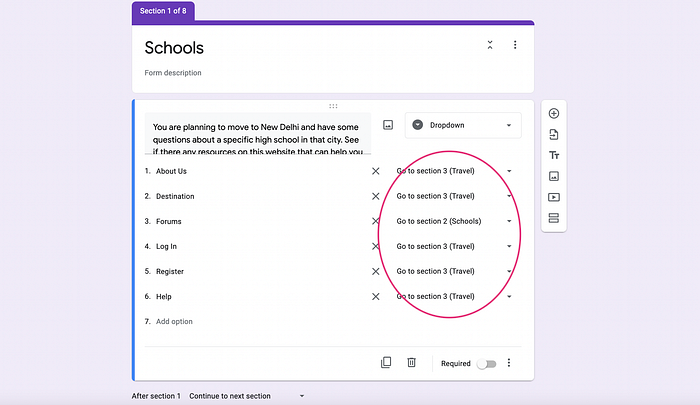
Step 3
For the one correct choice in a dropdown, direct users to the next part of the question, which will be in the next section. For all other choices, select the section that begins the next question series. This is where the naming convention discussed above — using same section names for all parts of the same question — reduces errors that can arise from inaccurate redirections in the survey.
For example, if a survey participant chooses the wrong answer at the first hierarchy level, i.e., the first part of a question, they will then be directed to the first part of the next question.
Step 4
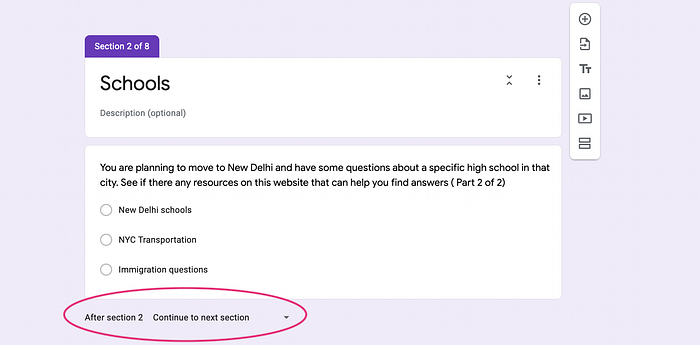
For all multiple-choice questions — which will be the final parts of every question — use the default ‘continue to next section’ option at the bottom.
Step 5
For the last question on the survey, redirect users to “Submit Form” if they choose a wrong answer.

Next steps
Read the second part of this article to know how to interpret results of a Google forms tree test, and also understand the pros and cons of this tool.

