Create fast & customizable animations with Smart Animate — Figma

Hacé click aquí para ver este post en Español
Most times for me, the best way to get an animation or interaction done fast is to boot up After Effects and get right into business.
But sometimes you just want to have a simple and easily iterable interaction right in your prototype, and thanks to Smart Animate on Figma, this is actually pretty straightforward!
Today I’ll show you how you can solve an interaction animation with just four frames, by making use of all built-in features of Figma.
Smart Animate Basics
Before getting our hands dirty, we’ll need to go over some of the basics regarding the Smart Animate feature of Figma.
Smart Animate is one of the animation types you can use when setting up your interactions in Prototype mode.

It keeps track of the Scale, Position, Opacity, Rotation, and Fill color values of all the layers that have the same name and hierarchy on your different frames.
All you need to do is make the changes between our frames, enable Smart Animate, and Figma will do its magic!


You can check which layers are being considered for Smart Animate by hovering your mouse on top of them, they should light up on the other frames where they’re located.

Easiest way to ensure the names are all the same is to just duplicate the frames when your general design ideas are done.
Click here if you want to go more in-depth with Smart Animate.
So, now that we know what Smart Animate is and how it works, let’s kick off by making our first animations using Figma
Let’s get started!
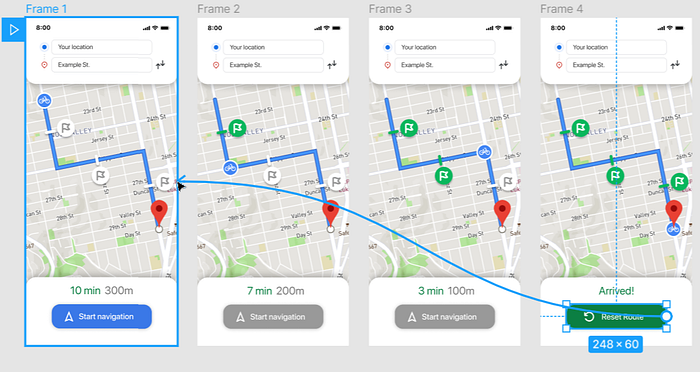
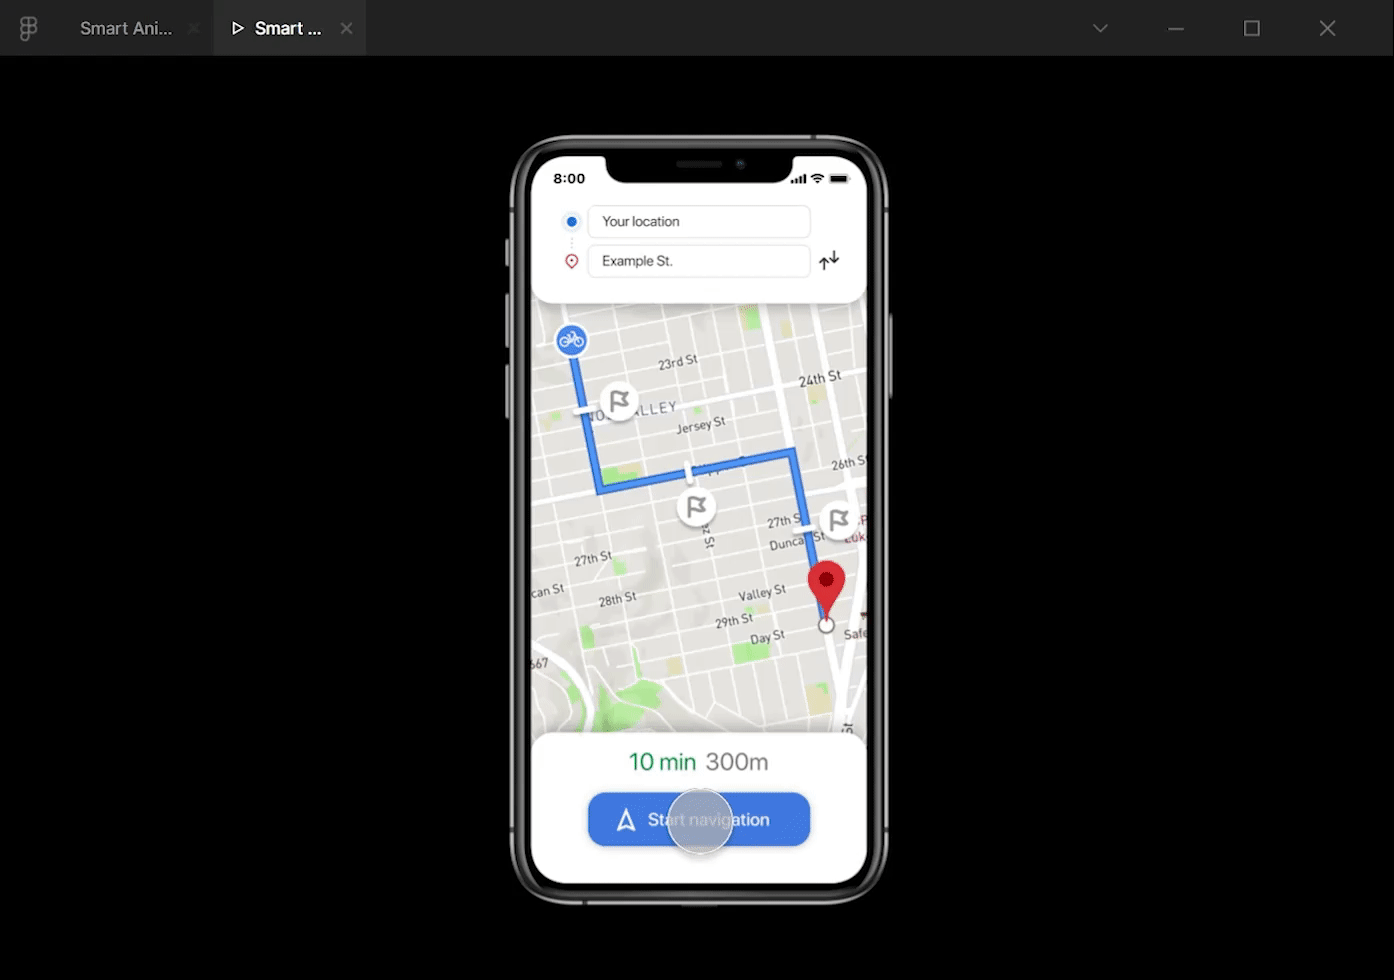
First off, we’ll start with a basic app concept just so we can see this in a more realistic fashion:

This is a simple map-based app where you set a route and some checkpoints so you can keep up with your biking schedule.
Click here to find the base Figma file for this tutorial
Our goal here is to add a simple animation of the bike completing the route and clearing different pre-set checkpoints as it gets to its destination.
We’ll start by duplicating our initial frame by holding ALT and dragging it to the side (you can achieve this by pressing CTRL+D too).

Once we’ve duplicated the frame, we’ll click on the layers that we want to animate and we’ll change them accordingly.

Here we’ll move our bike icon to the first left turn, change the text of our distance counter, change the fill color of our checkpoint icon and swap our button background color.
Once we’ve finished our desired changes, we’ll press the Prototype tab on Figma, so we can begin creating the start section of our animation.
In this case, we want our “Start Navigation” button to be the start of the animation, so we’ll click the button layer, and drag it to our second frame.

The Interaction Details menu will open up, and we’ll be able to change what the button will do and how it will do it.
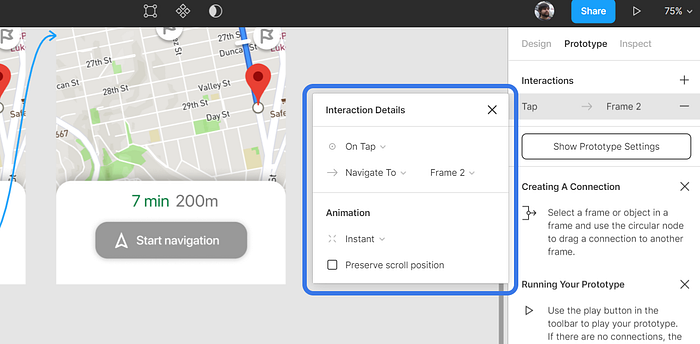
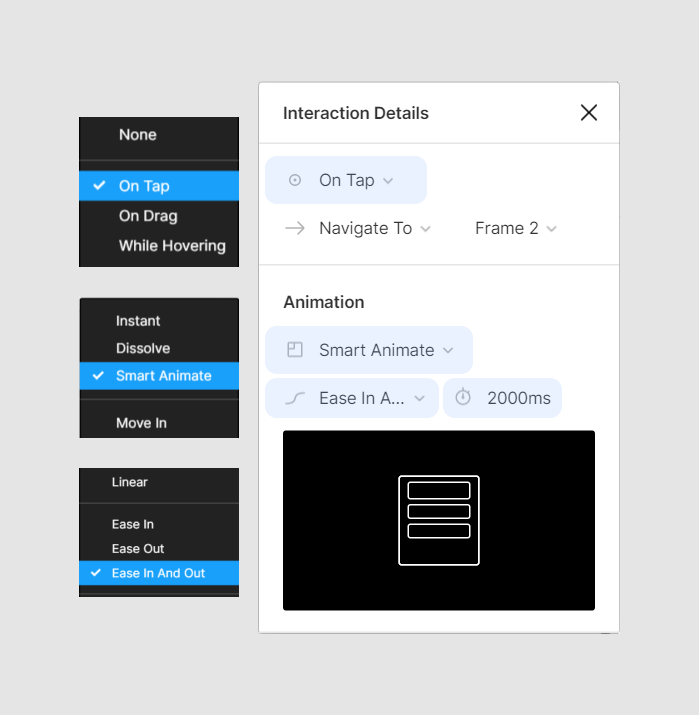
For the start section, we’ll use the “On Tap” interaction as we want the button to navigate us to the next frame when we tap it.
Then, on Animation, we’ll choose “Smart Animate”, this will ensure Smart Animate is the transition used for this interaction.
Finally we’ll set the duration to 2000ms (2 seconds) because we want this animation to be long enough so it doesn’t distract our users.
We’ll also change the easing to “Ease In and Out” but feel free to try out different easing curves (and even make your own custom curve!) so you get the animation to be just as you want it.
Now that we have our first two frames we can test out our animation!
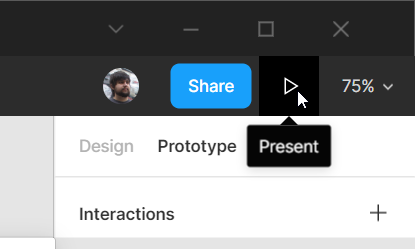
For this we’ll press the Play icon on the top right, to present our Prototype.
We can see that by tapping our Start Navigation button, our animation will play, and our layers will change their values as we set them!

If all you needed was a simple two frame animation then congratulations! You should be able to just make use of Smart Animate for your projects with ease.
The thing is that, thanks to the “After Delay” interaction, we can make our animations even more interesting and intricate!
What we will do now is complete our bike’s trail by chaining 2 more frames with the help of After Delay.
Using After Delay to chain different frames
We’ll duplicate our 2nd frame, and apply the changes to the bike, the next checkpoint, and the distance value.

Then, on the Prototype tab, we’ll click our 2nd Frame and we’ll drag its interaction to the 3rd frame, and then we’ll add the “After Delay” interaction.
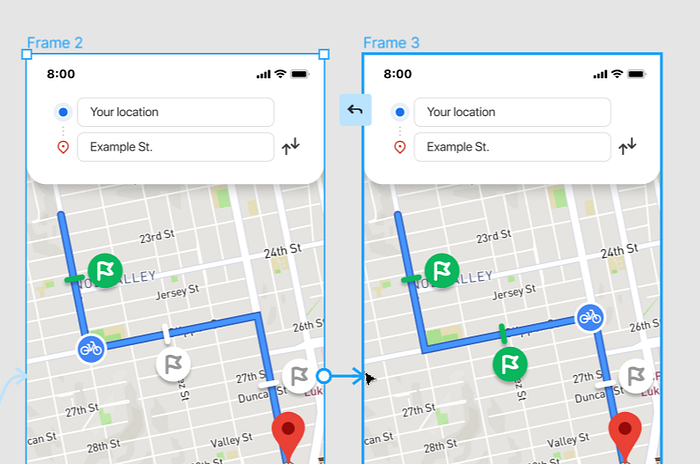
This interaction will wait a determinate amount of milliseconds, and it’ll navigate us to our chosen frame.
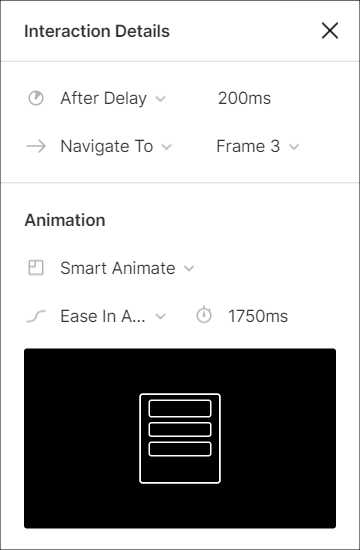
For this frame we’ll use 200ms (0.2 seconds).
And then, we’ll choose Smart Animate again, with an animation length of 1750ms (1.75 seconds).
Now, we can test our prototype again!
We start on our first frame, so we have to tap the button to get the animation going.
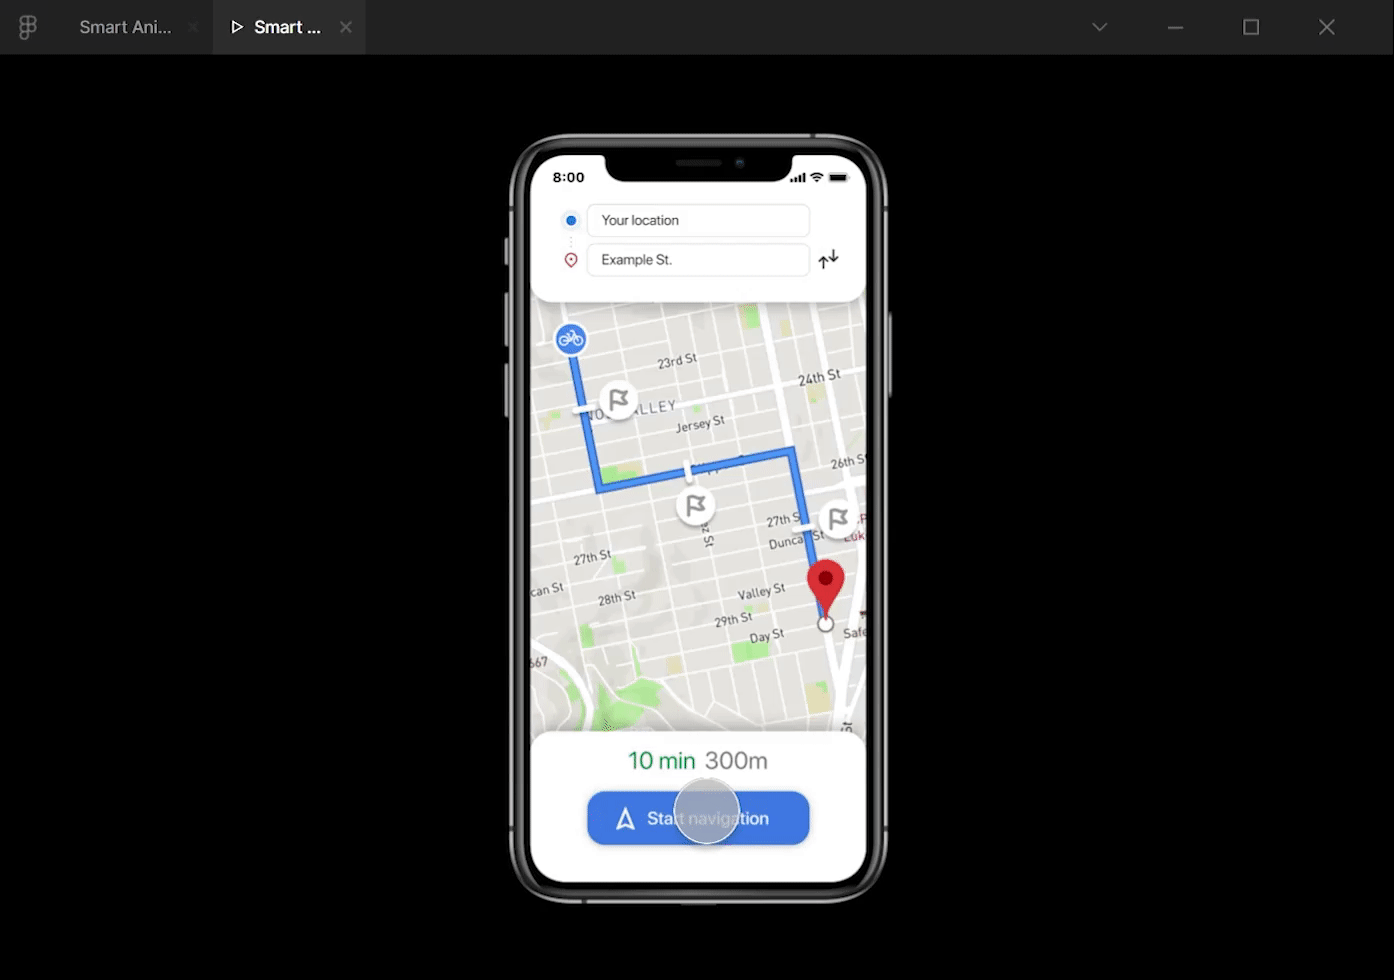
As we can see, the tap interaction will take us to the second frame, and once its animation is completed, it waits for 0.2 seconds and it takes us to our third frame.
Nice!
Now all we need to do is make the same changes on our fourth frame and we’ll have a full animation ready for prototyping and testing with our users!
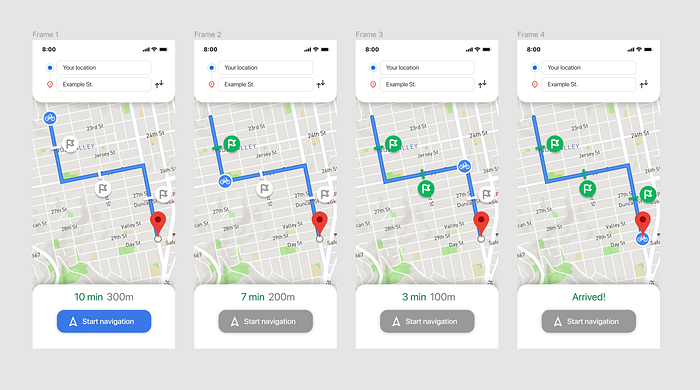
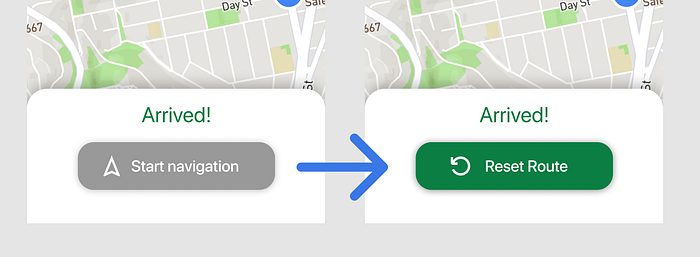
As a bonus, we’ll also swap our button to a “Reset Route” button, just so we can loop our animation whenever we want.
Now we can do our final prototype test to see what we’ve achieved here today.
We can see that as soon as we press our Start Navigation button, the animation will begin, and it will go through each frame successively thanks to the power of After Delay!
Thanks for checking out my first post, and hope you found it useful!

